This guide explains each section of your Client Portal dashboard in detail. By the end, you’ll know how to Launch campaigns, review campaigns, track leads, manage billing, and more.
 Watch these short Loom walkthroughs as a starting point:
Login to Our Client Portal at : http://portal.leadgenops.com/
All campaign launches are now handled directly through your new client portal. Once you log in, you’ll see the “Launch Campaign” section on the left menu of your dashboard.
Please click on “Launch Campaign.”

You will be prompted to a separate tab in your browser, where you will see a “+Create Campaign” button.
At the same time, you will also see a list of previously created campaigns along with their status and a "Lead List View" button.
Now, click on the “Create Campaign” button.

Once you click on “Create Campaign,” a new window will pop up, allowing you to upload your lead list.
Under “Lead List Source,” click on “Select Your Lead List Source.”
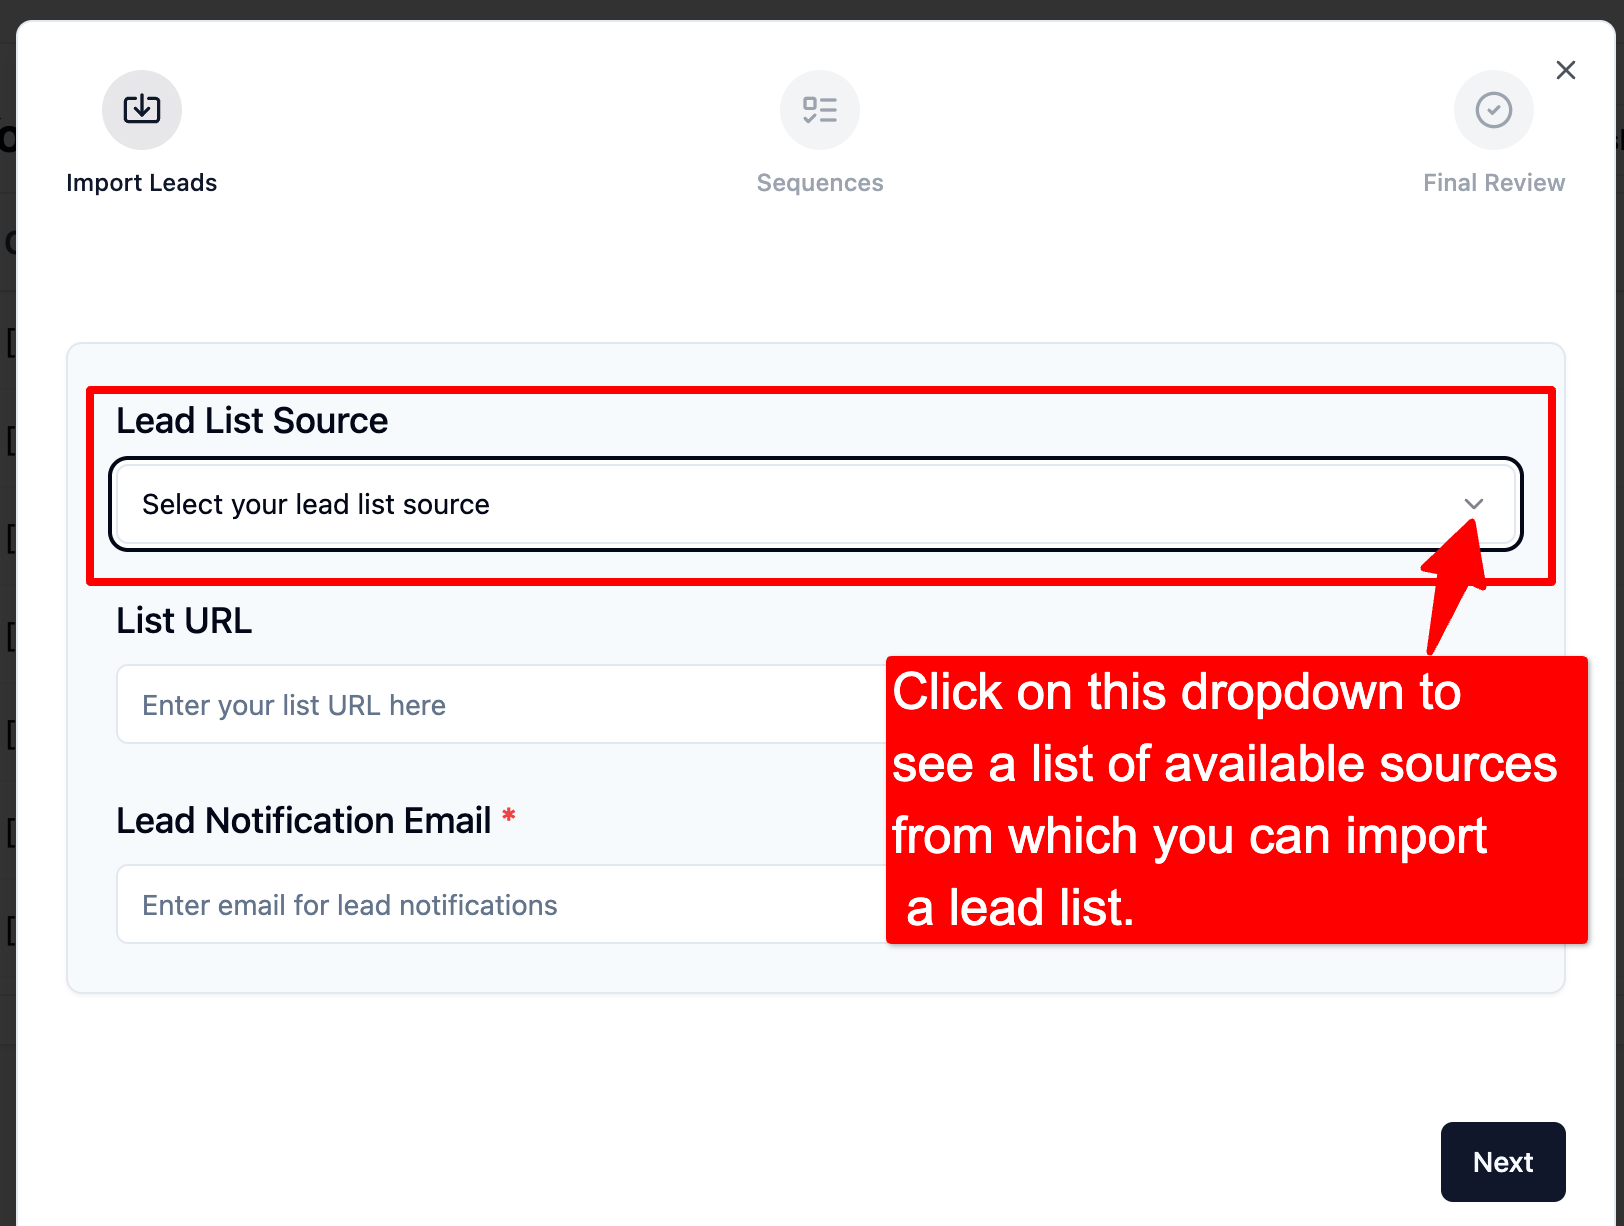
Once you click on the dropdown, you will see list of available sources from which you can import your Lead List

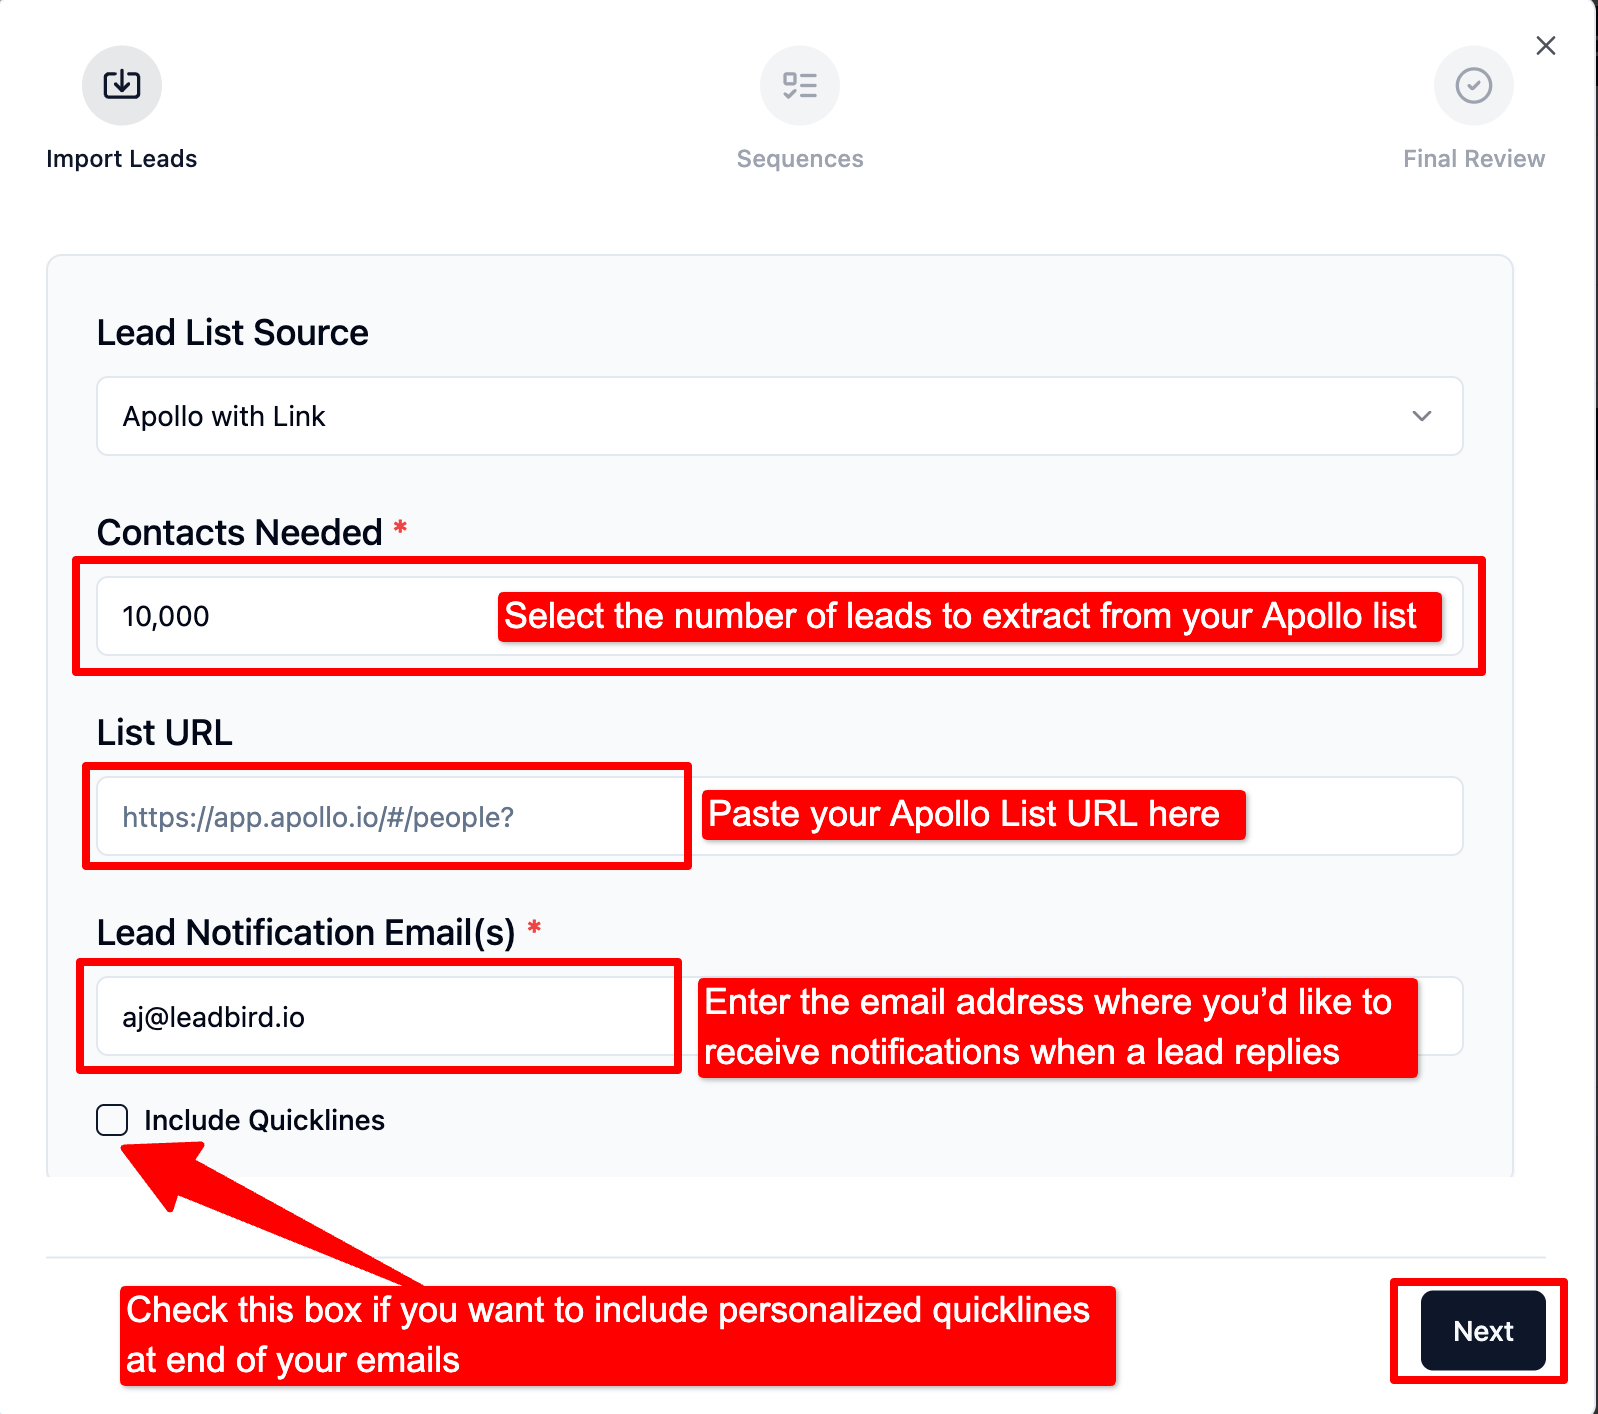
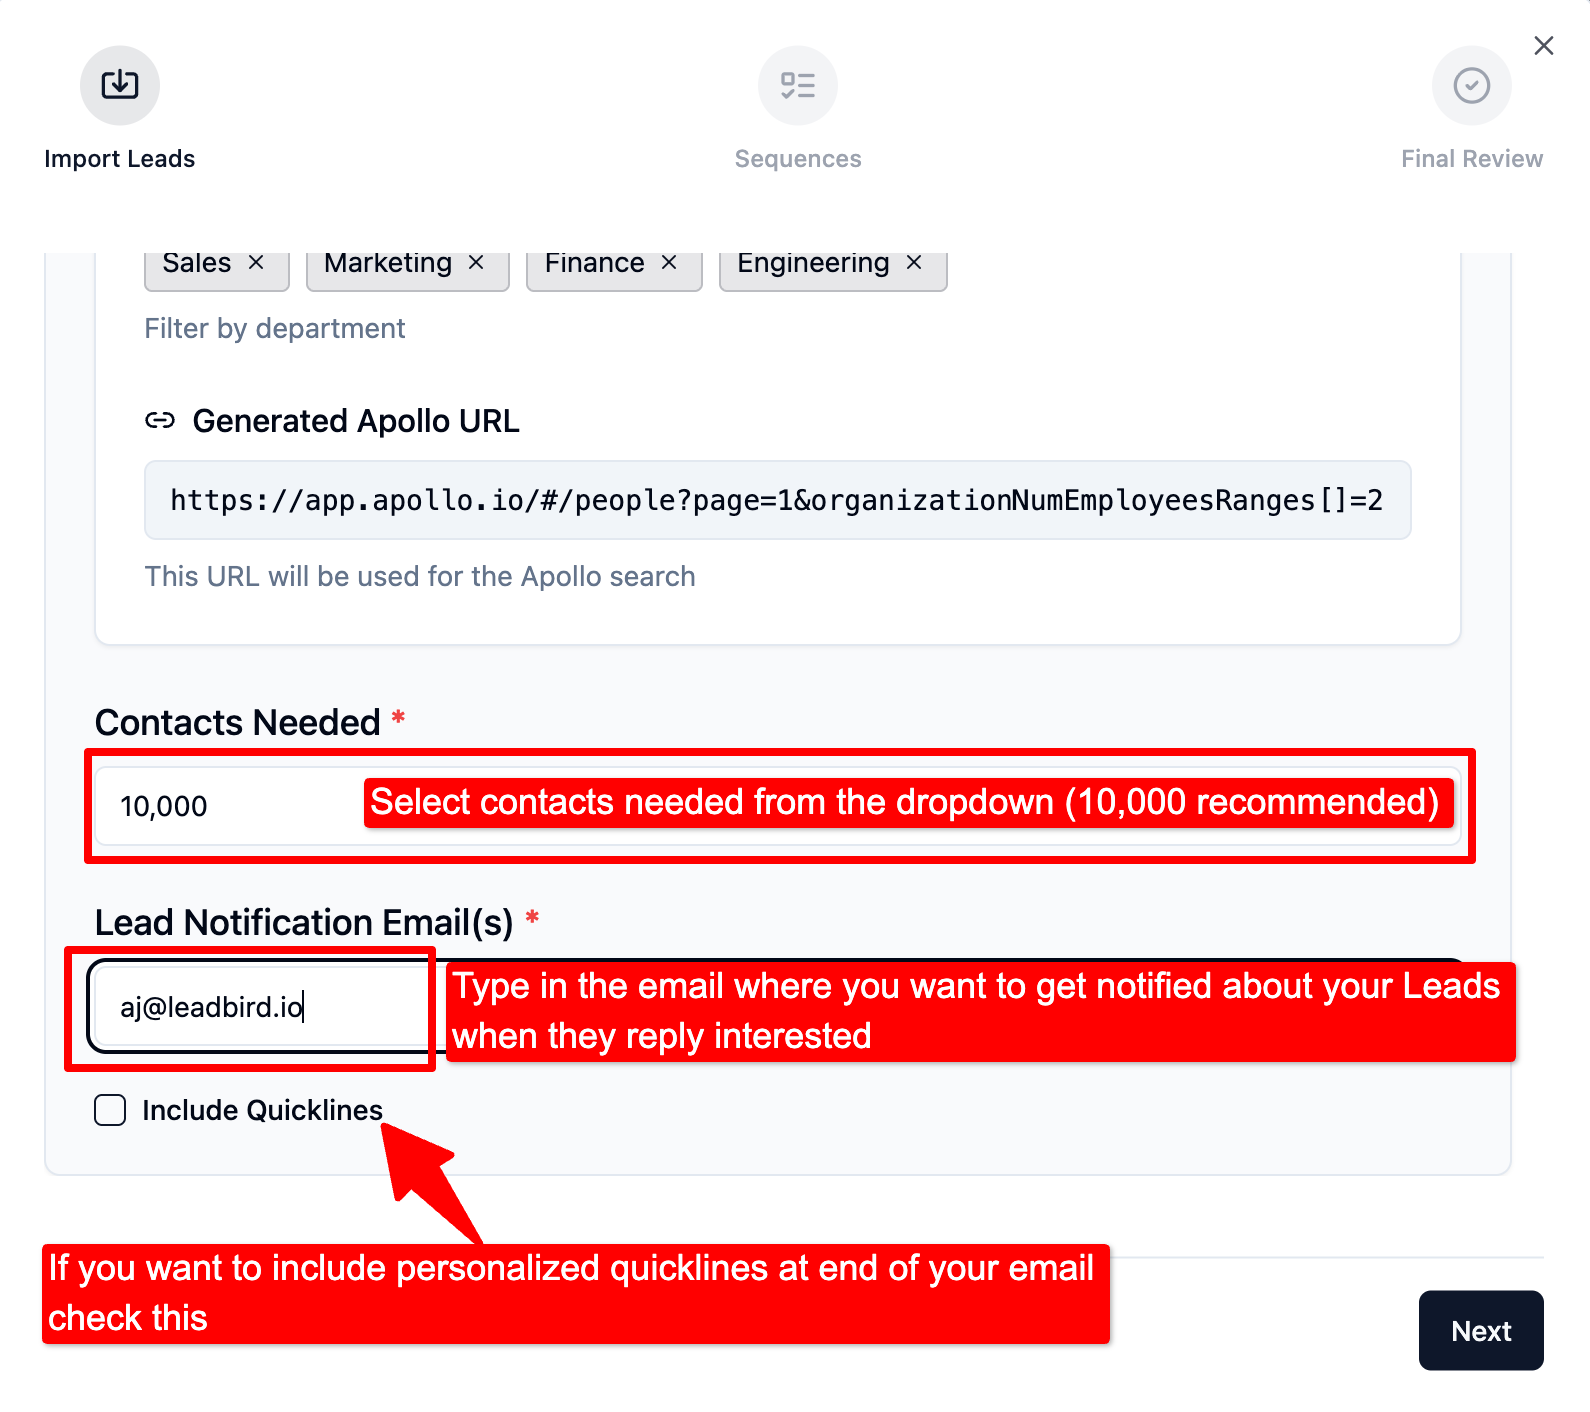
If you Select Apollo with Link, Paste the Apollo URL under “List URL” and Select the number of leads to extract from your Apollo list in the “Contacts needed” field. As a rule of thumb, if you want about 5,000 verified leads uploaded to your campaign, select 10,000. After enrichment and validation, those 10,000 records typically yield ~5,000 verified contacts (actual yield may vary based on data quality).
Then, under “Lead notification email,” enter the email address where you’d like to receive notifications when a lead replies.
Click on “Next” as shown in the screenshot
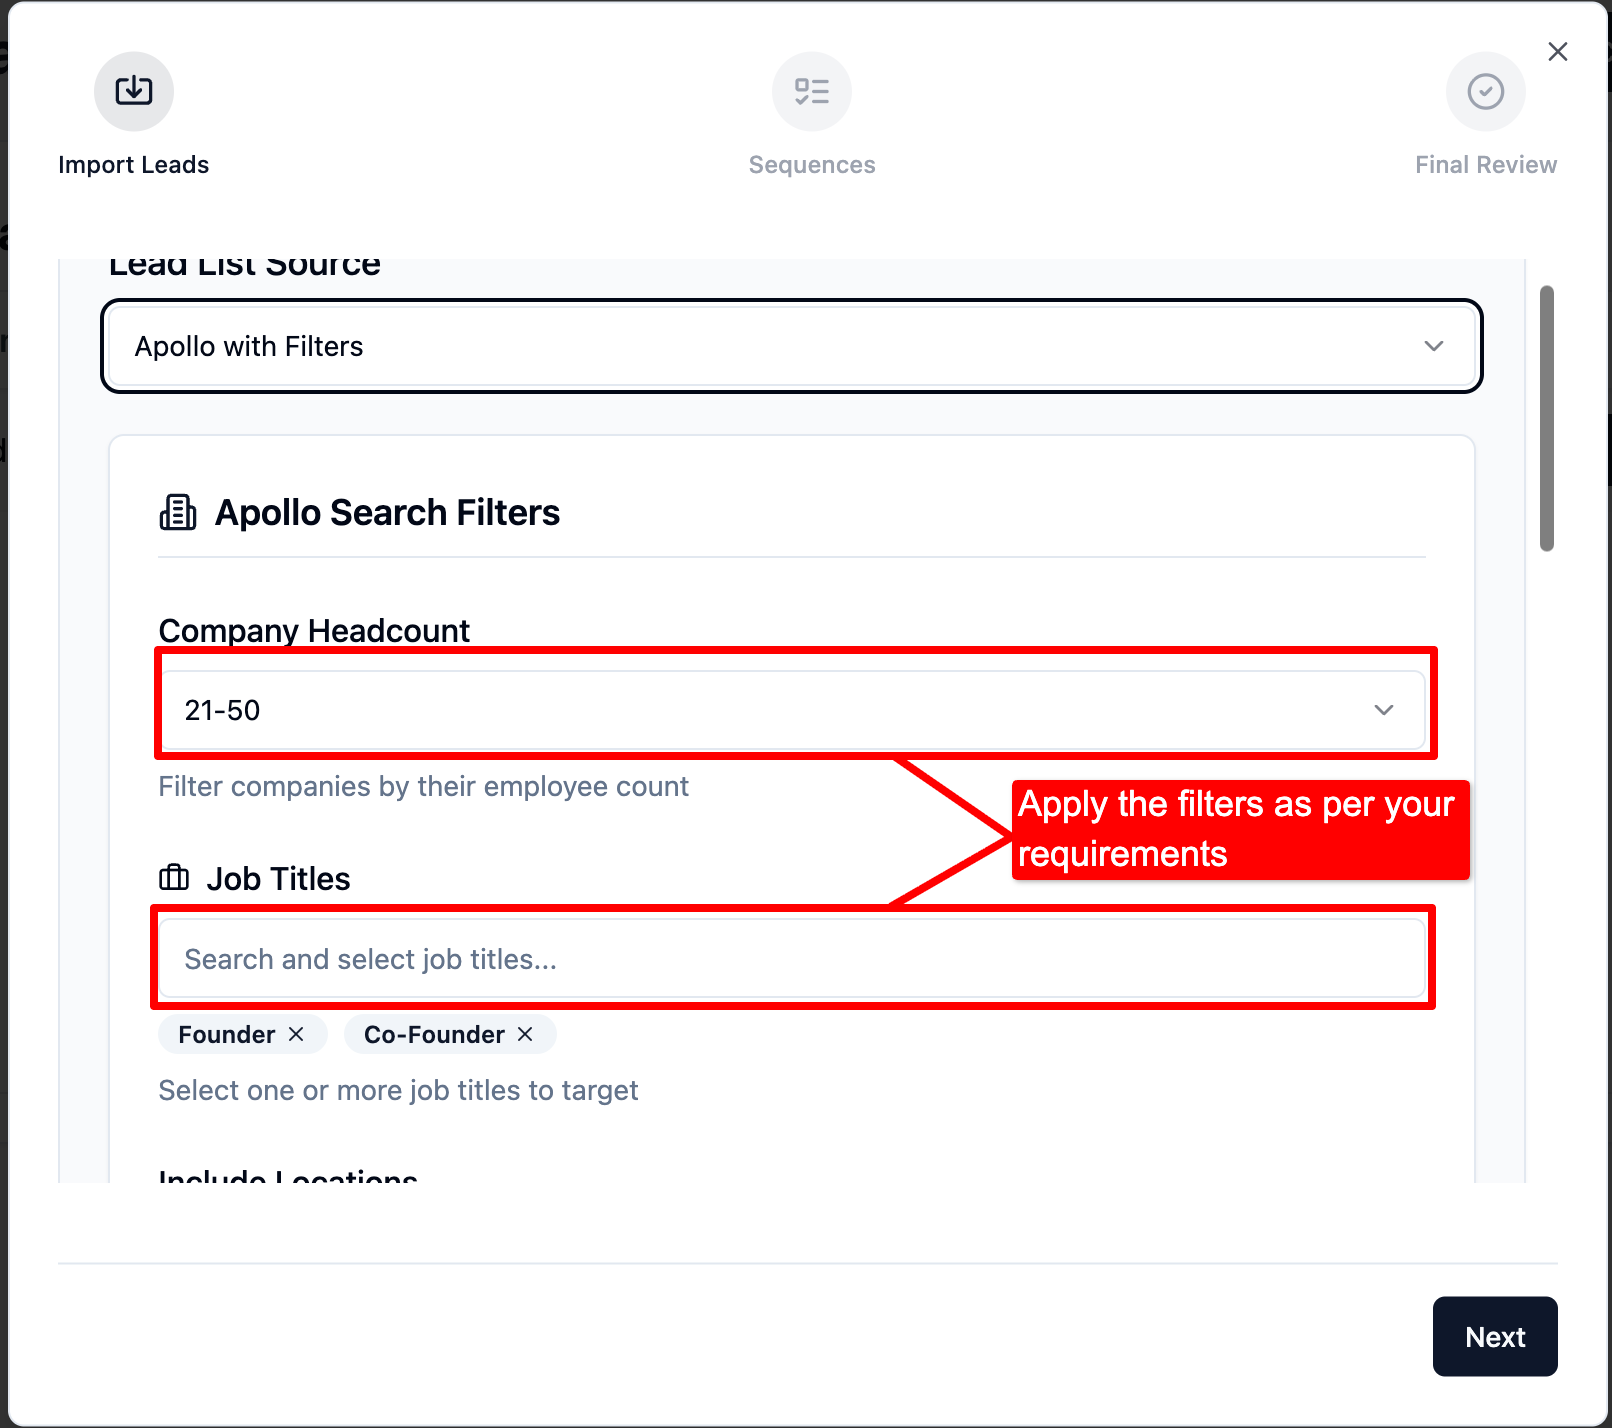
[NEW] Apollo With Filters
Apollo with Filters lets you build your target audience directly inside the Launch Campaign. No need to paste an Apollo saved-search link. You choose the filters; we handle the list build, enrichment, deduping, and attaching the leads to your campaign.

Once you choose the “Apollo with Filters” option, a panel will open prompting you to select your filters. Apply the filters according to your requirements.

Once you apply the filters, an auto-generated Apollo lead list URL will be displayed at the end for your reference.
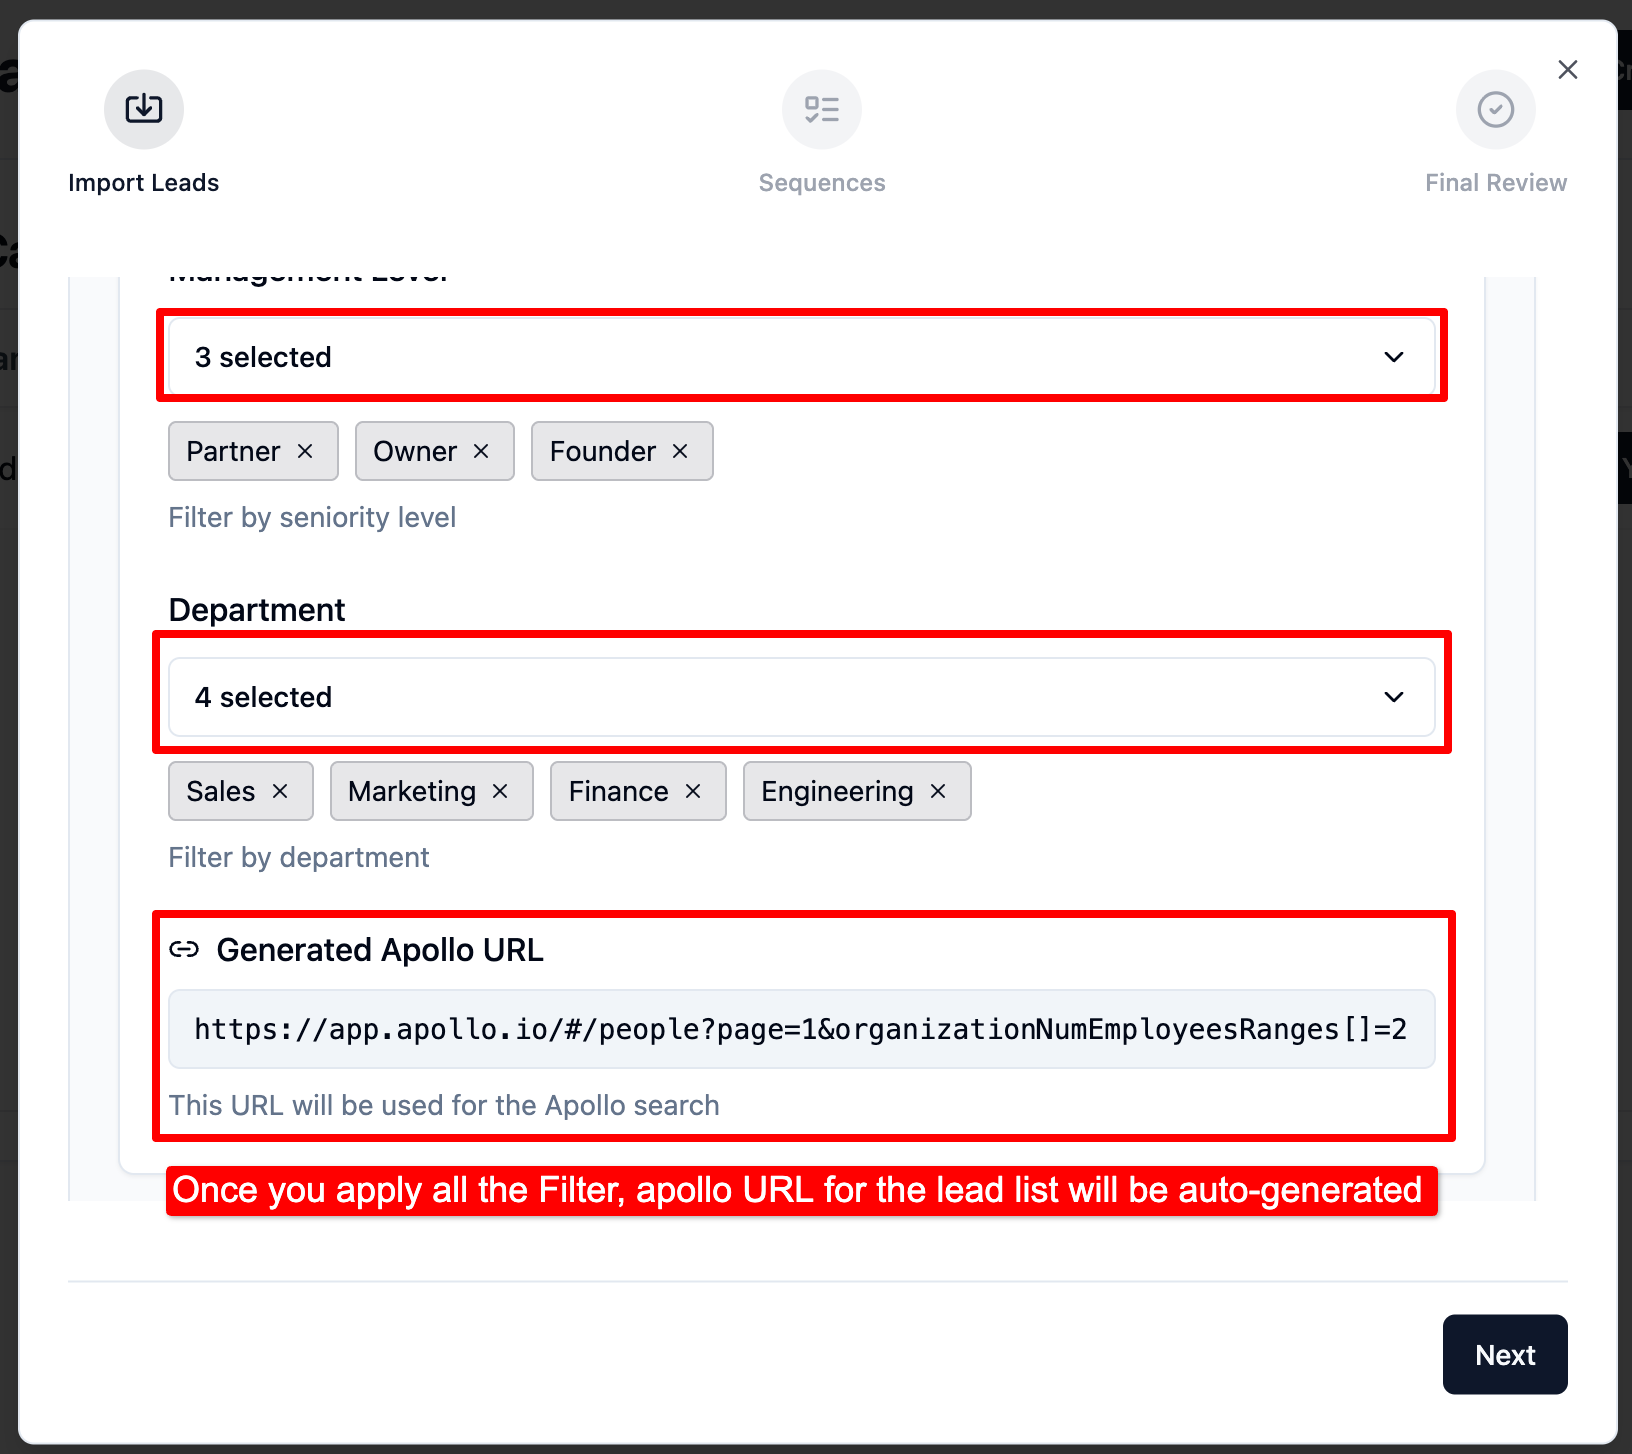
Select the number of leads to extract from your Apollo list in the “Contacts needed” field. As a rule of thumb, if you want about 5,000 verified leads uploaded to your campaign, select 10,000. After enrichment and validation, those 10,000 records typically yield ~5,000 verified contacts (actual yield may vary based on data quality).
Then, under “Lead notification email,” enter the email address where you’d like to receive notifications when a lead replies.
In case, you want to upload a CSV file containing Leads :
Click on “Select CSV File”
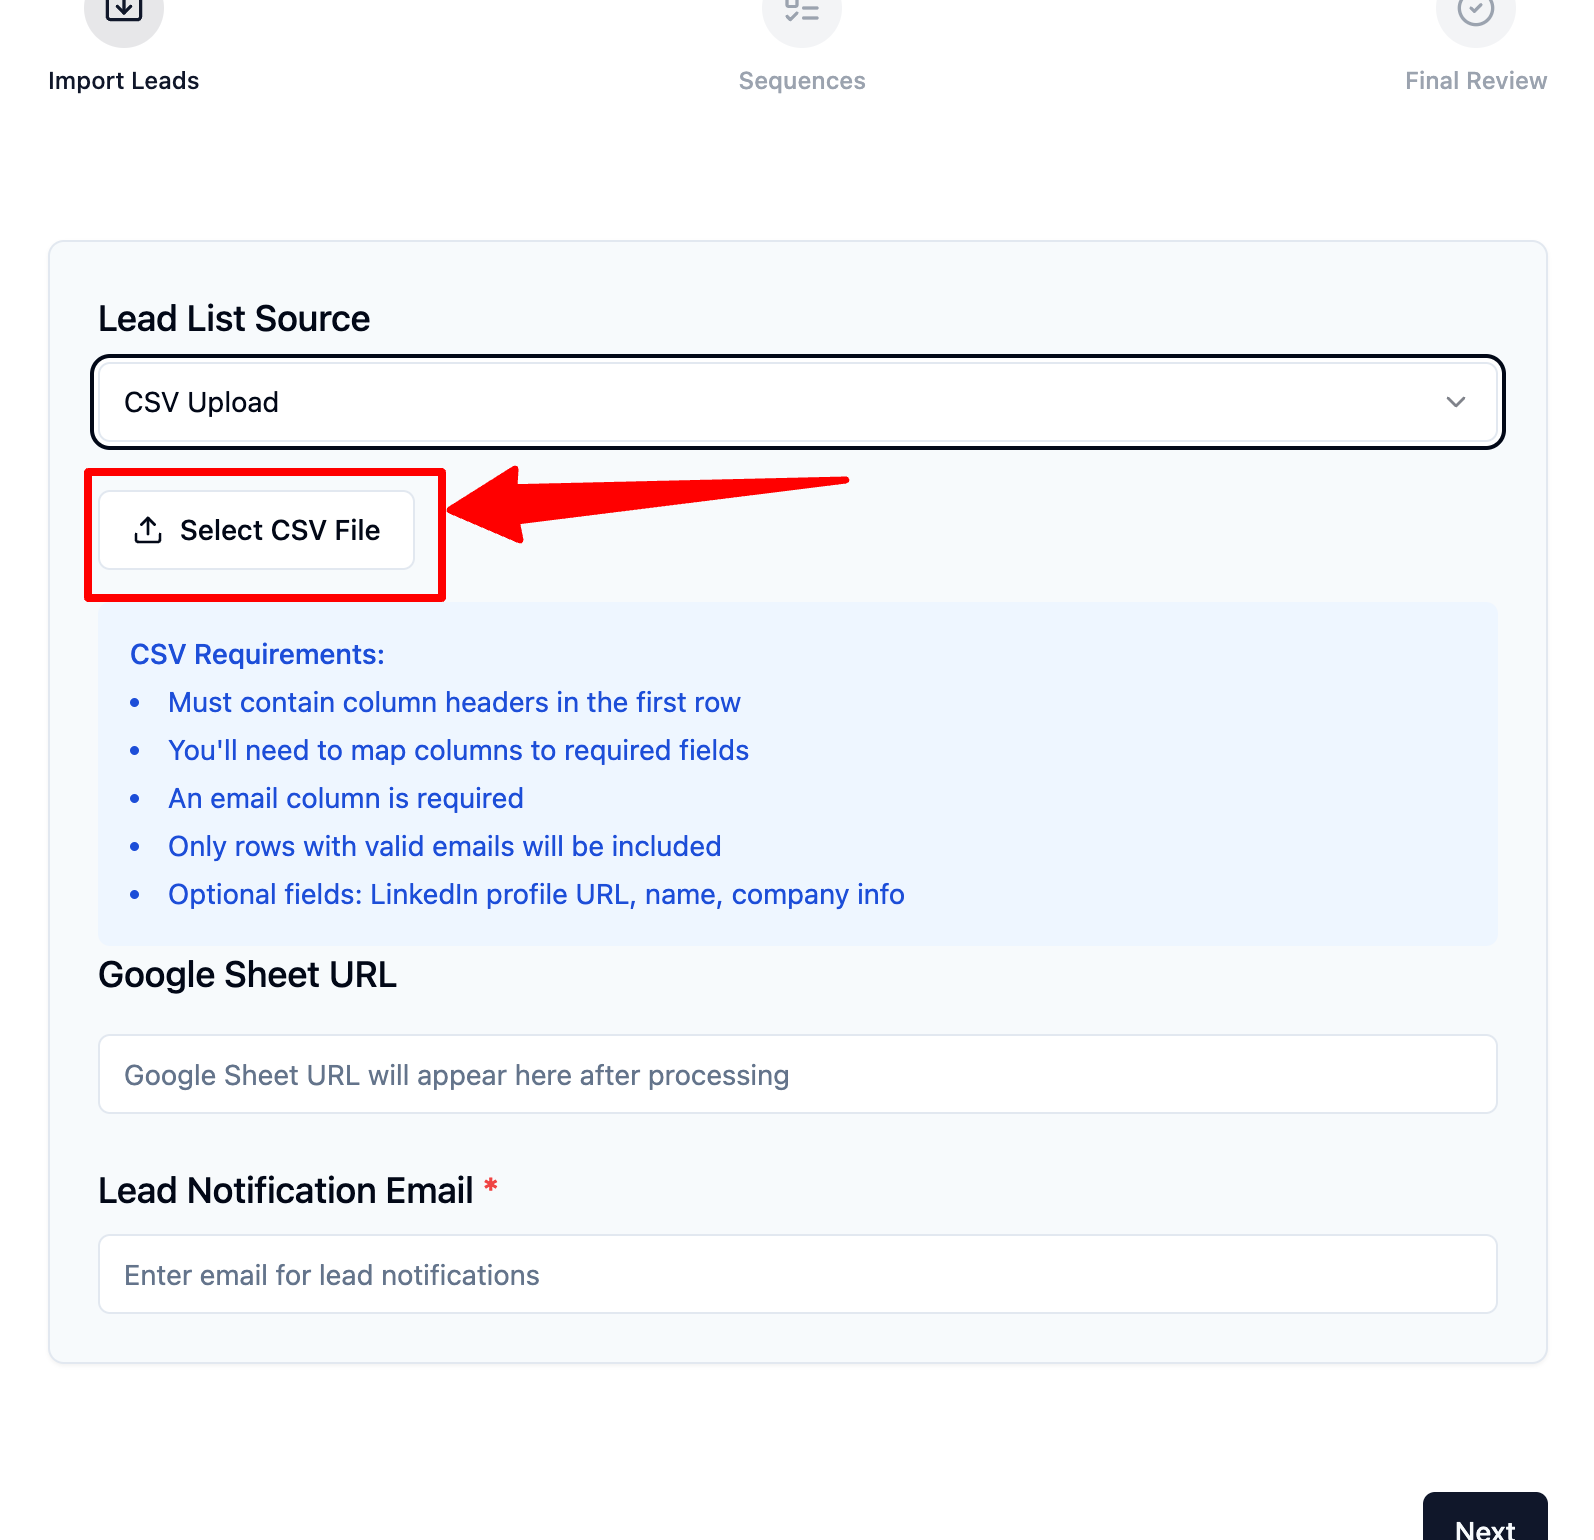
Once you upload the CSV file, please verify that all the fields are mapped correctly. You’ll also see an option to “Add Custom Field”—this allows you to map any remaining unmapped columns from your CSV.
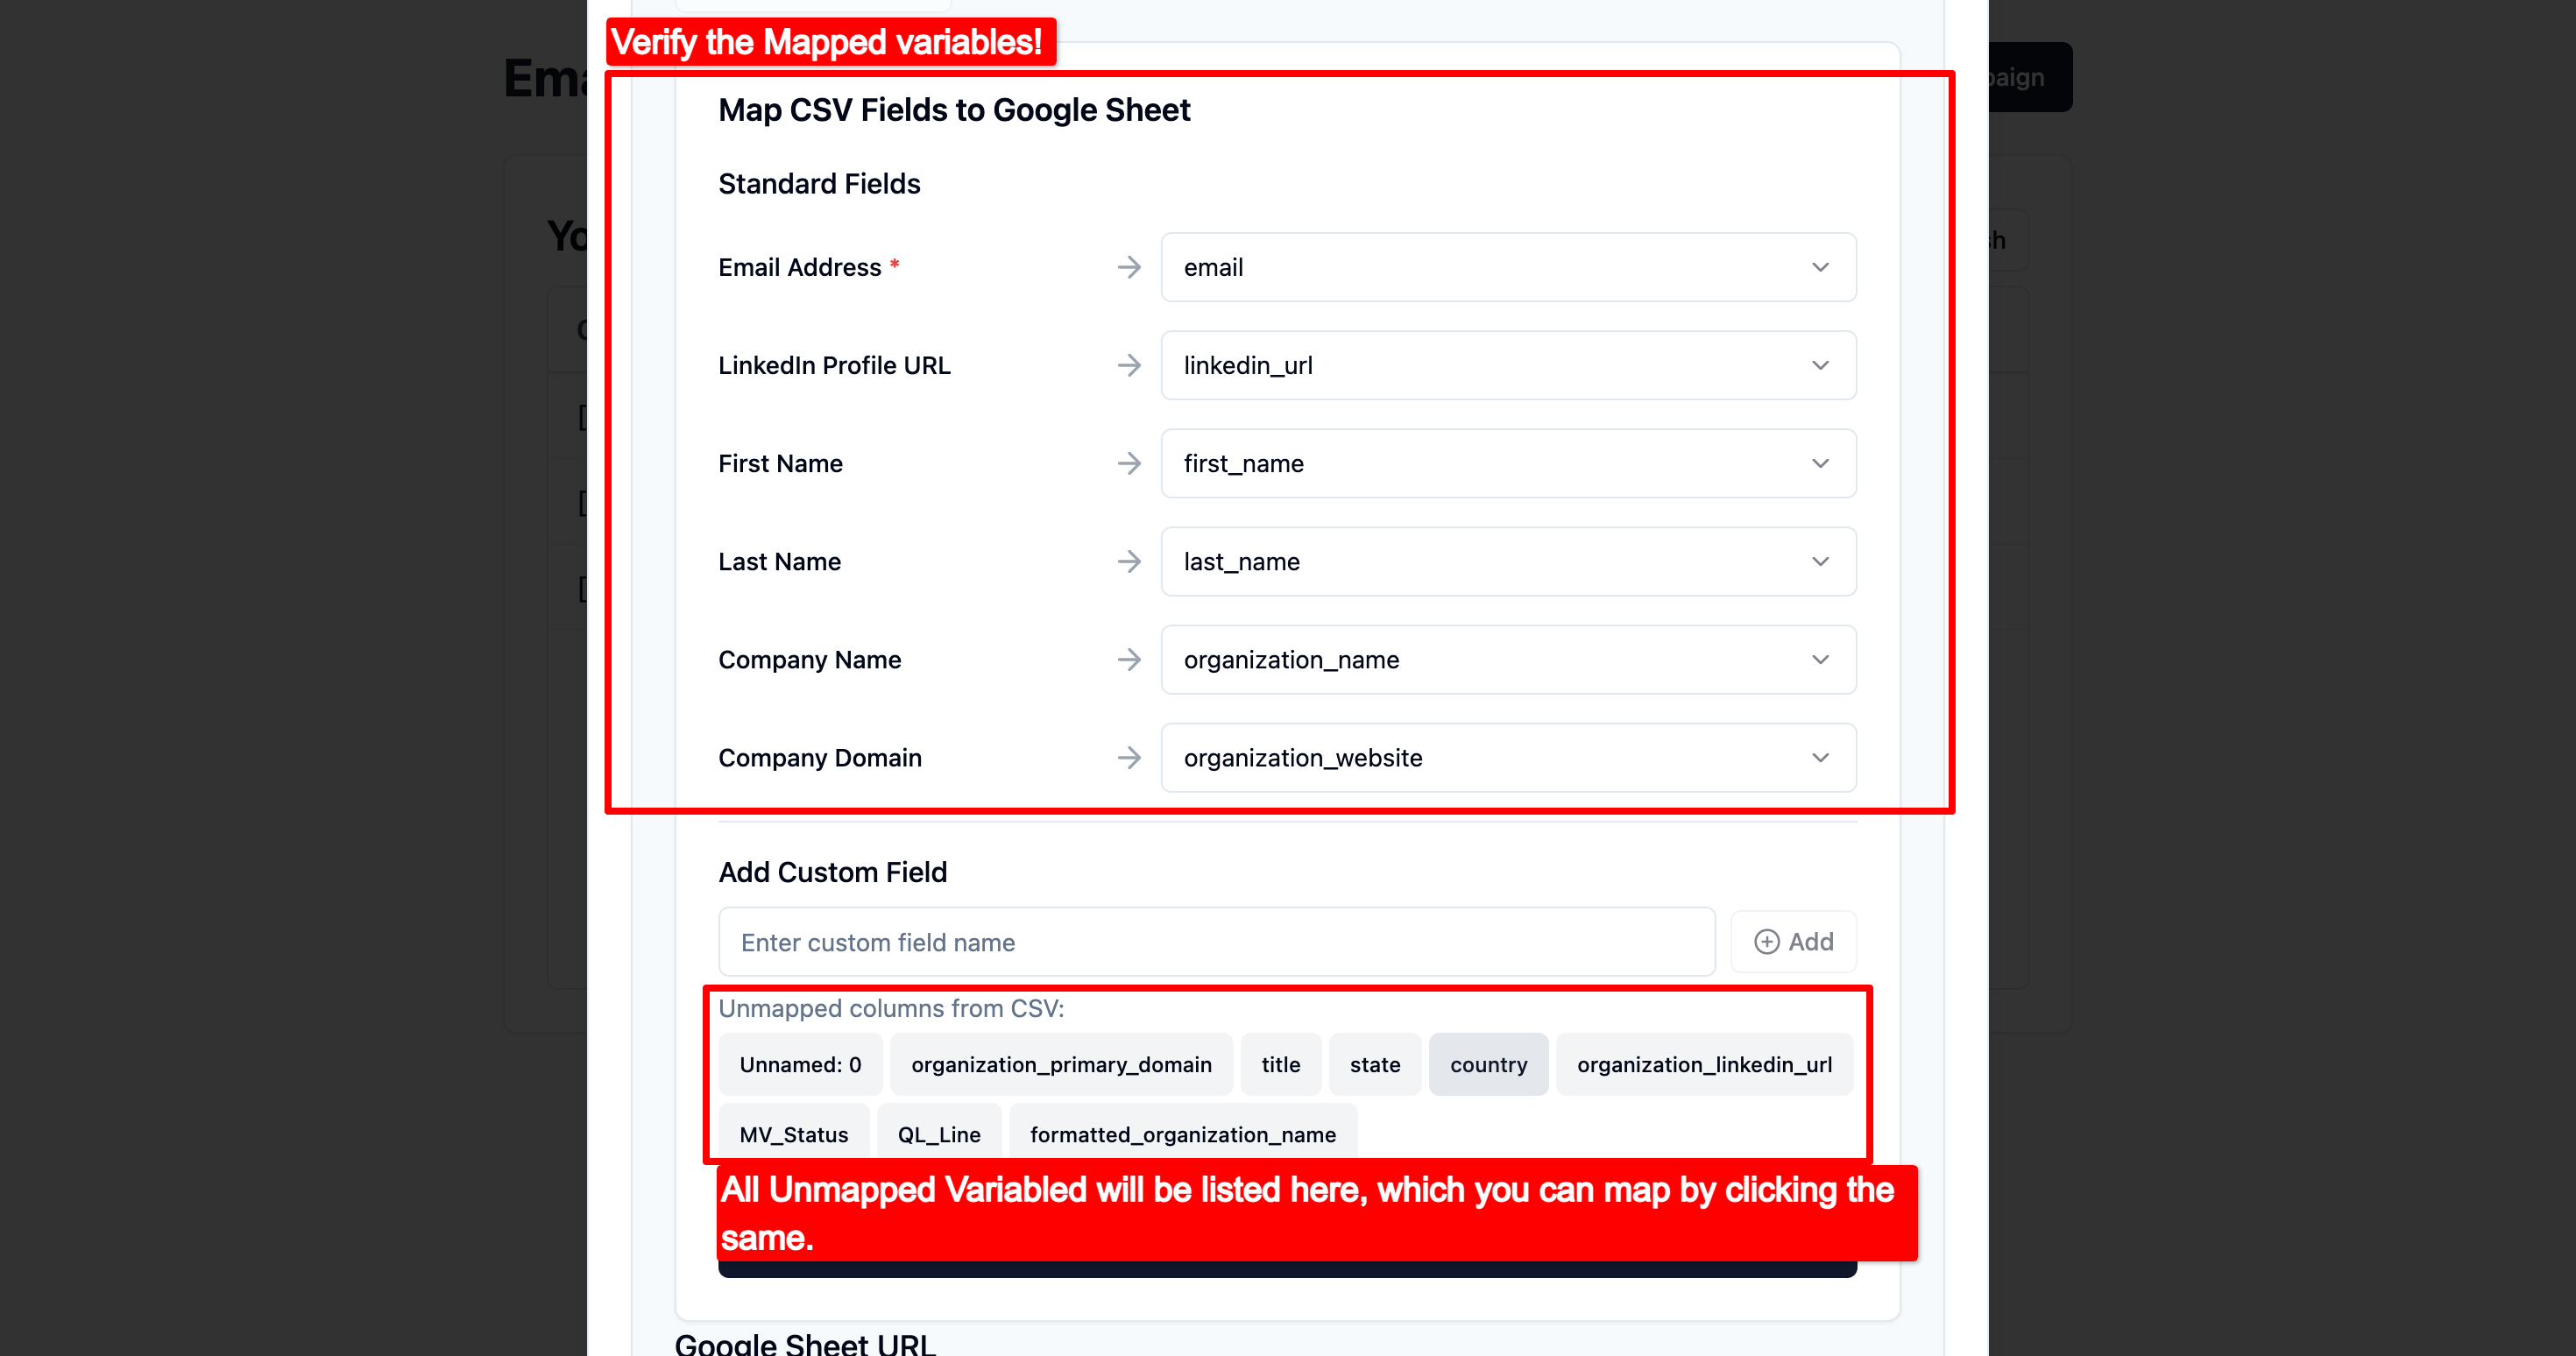
If you'd like to map them, simply click on each unmapped field and then click “Add.”

Click on “generate google sheet”. A google sheets link will be auto populated.

Enter the email address under “lead notification email” and click Next

You will now be navigated to Sequence tab where you will have to write your Email variants , Please refer the screenshots to get a better understanding of.
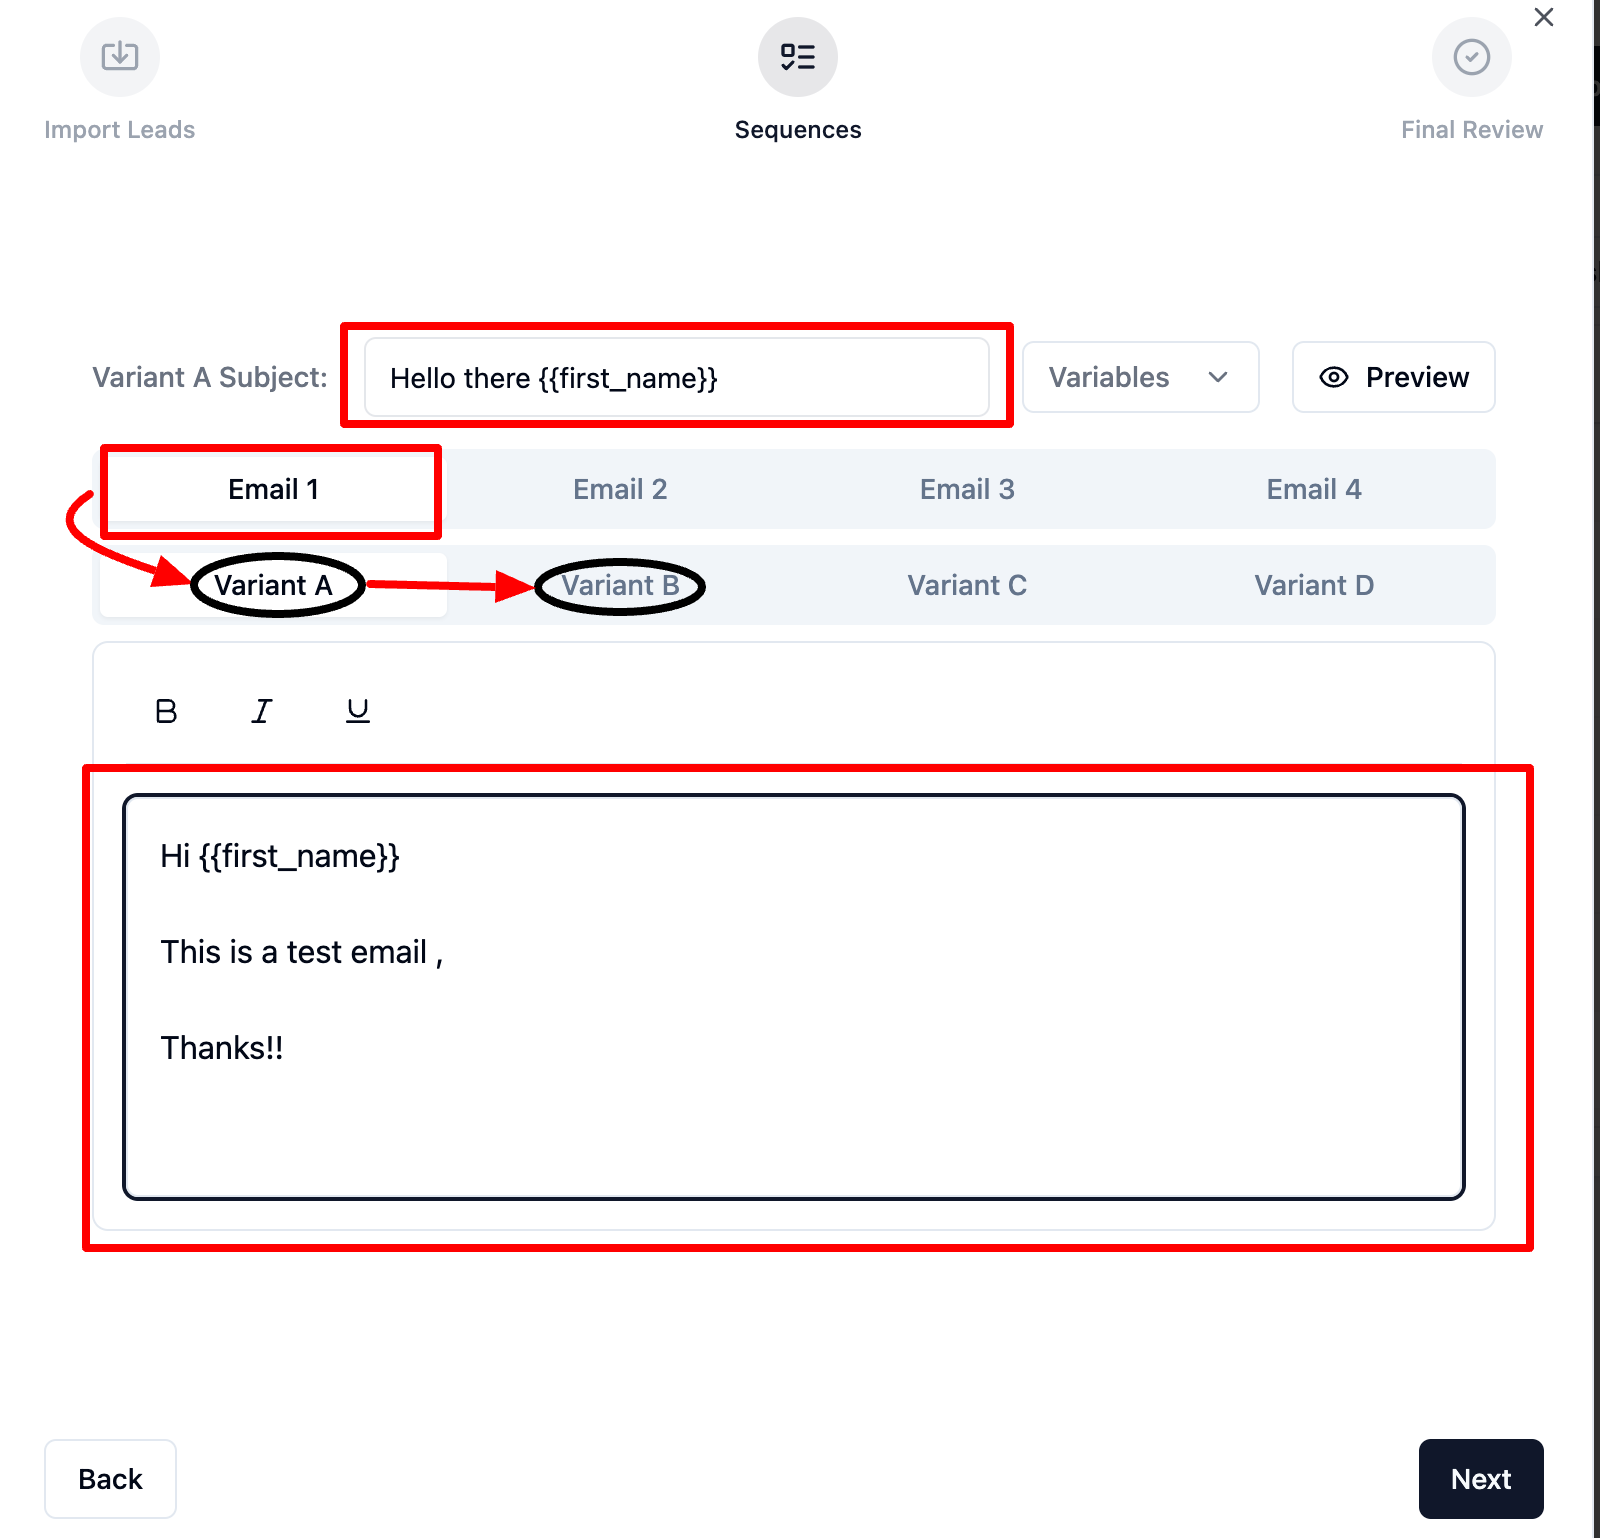

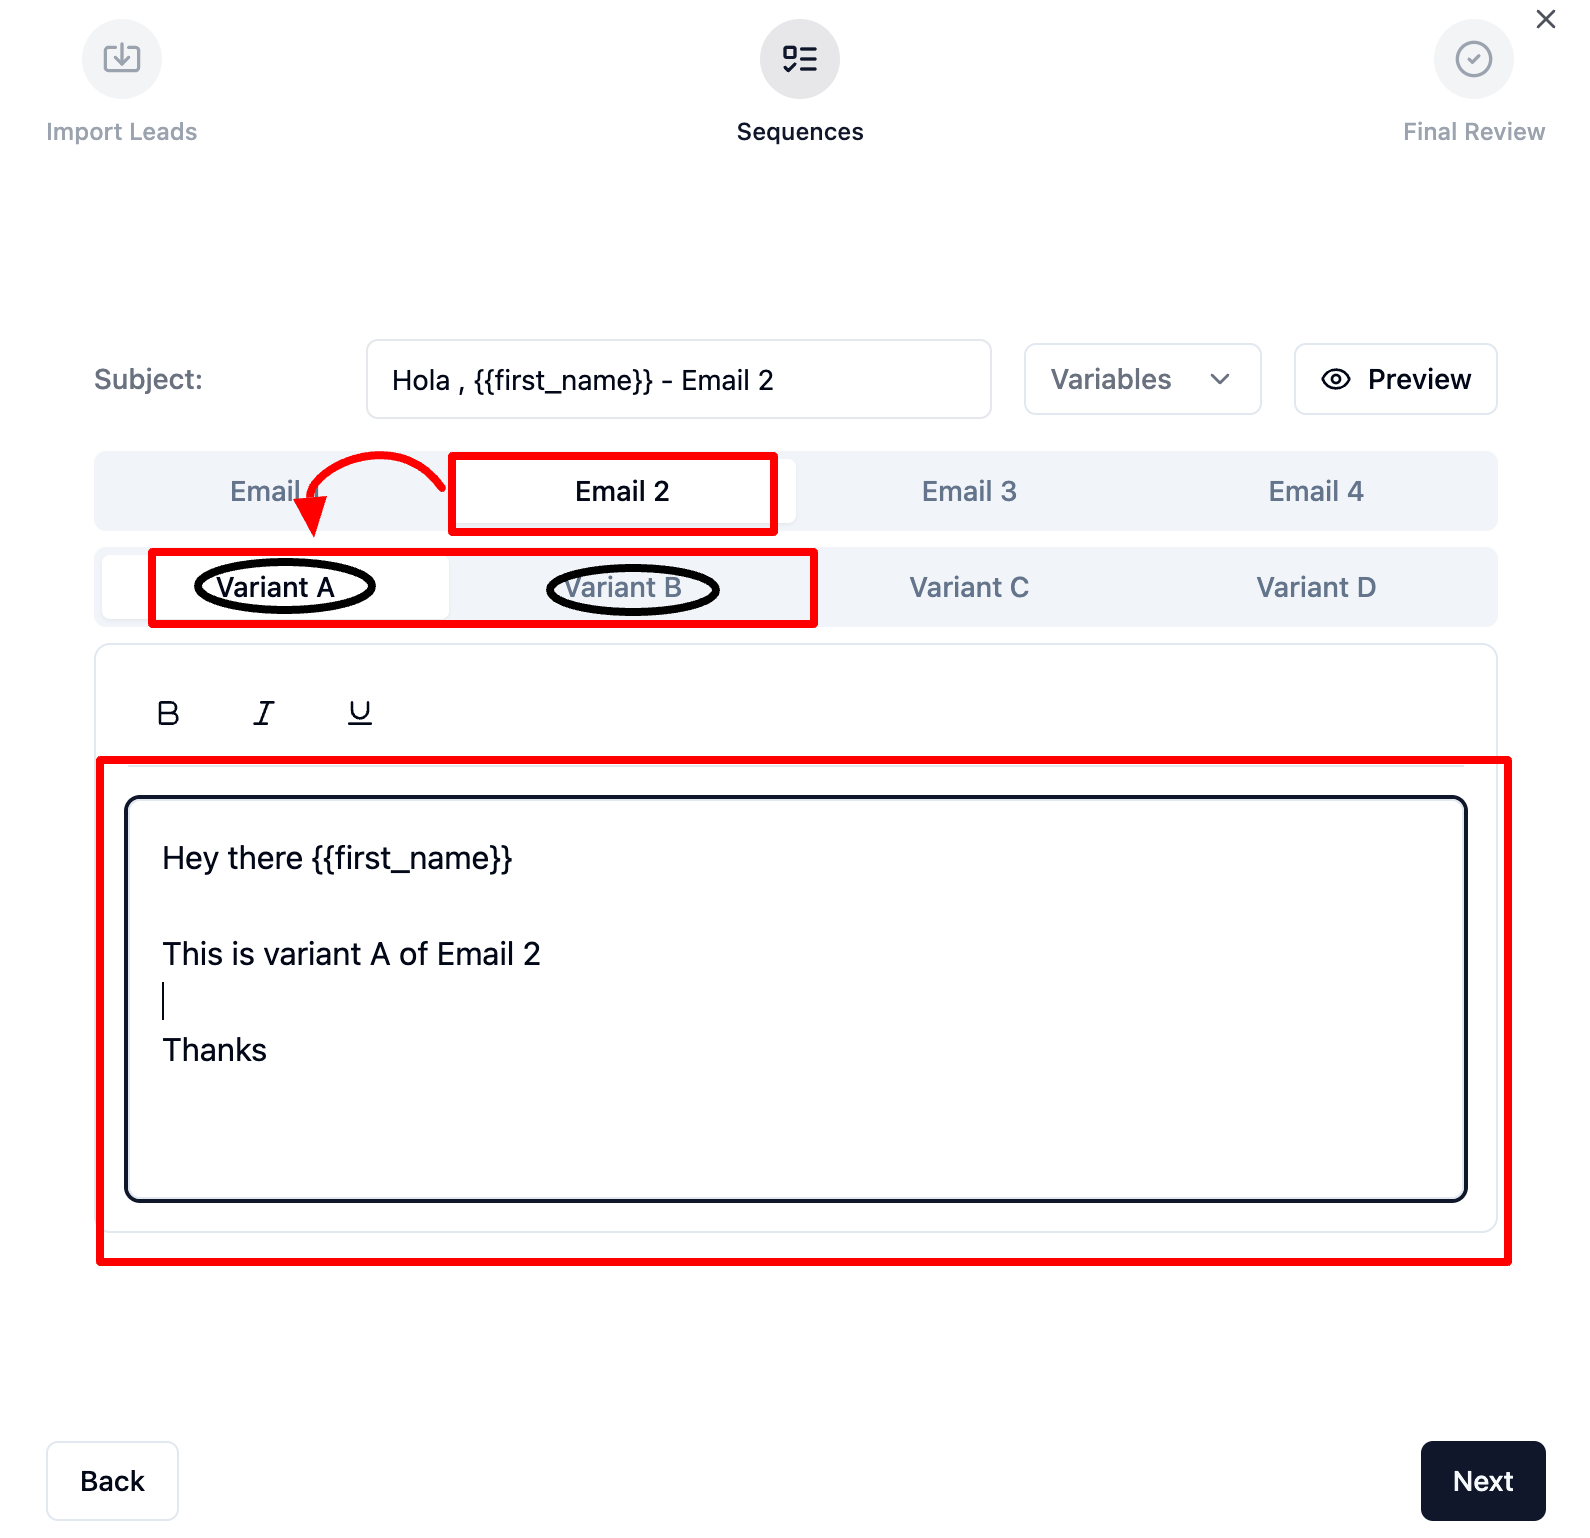
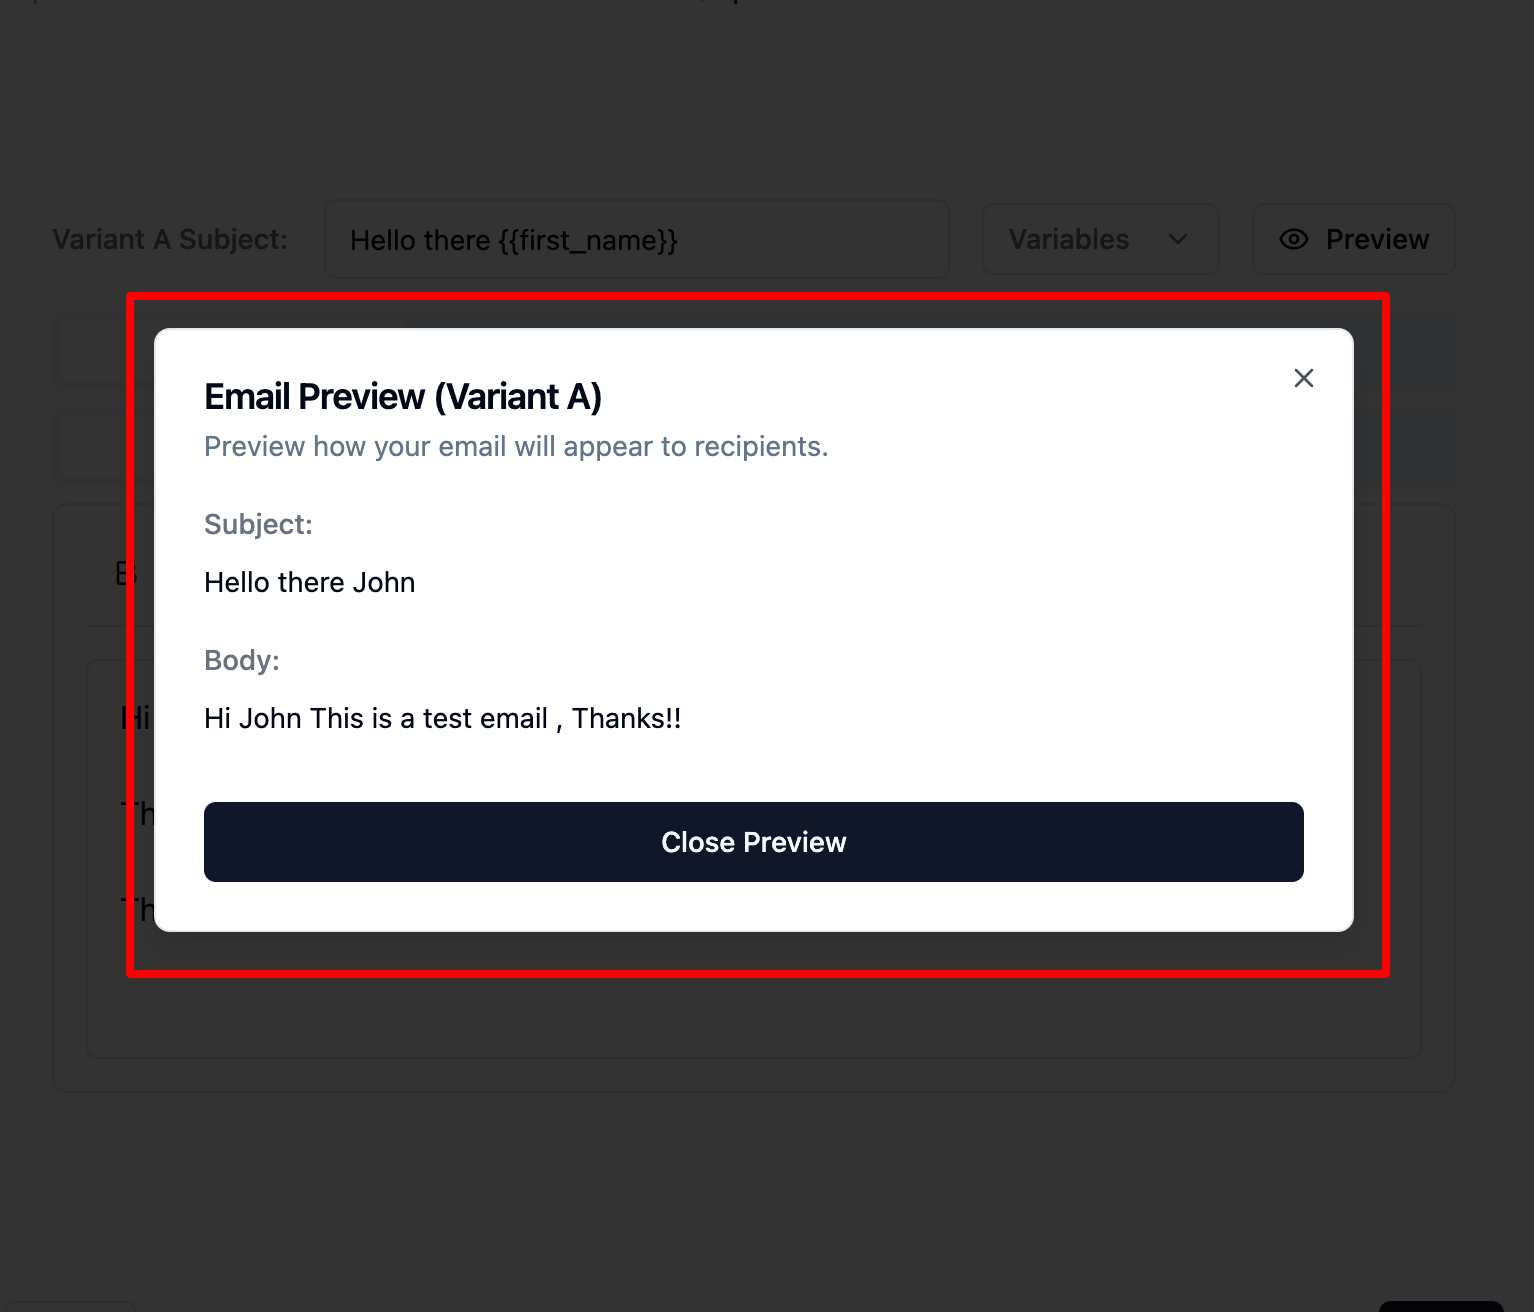
Once you are done Drafting your Email Sequences, Click on “Preview” to verify everything looks good!
Click on Close preview and Click Next.
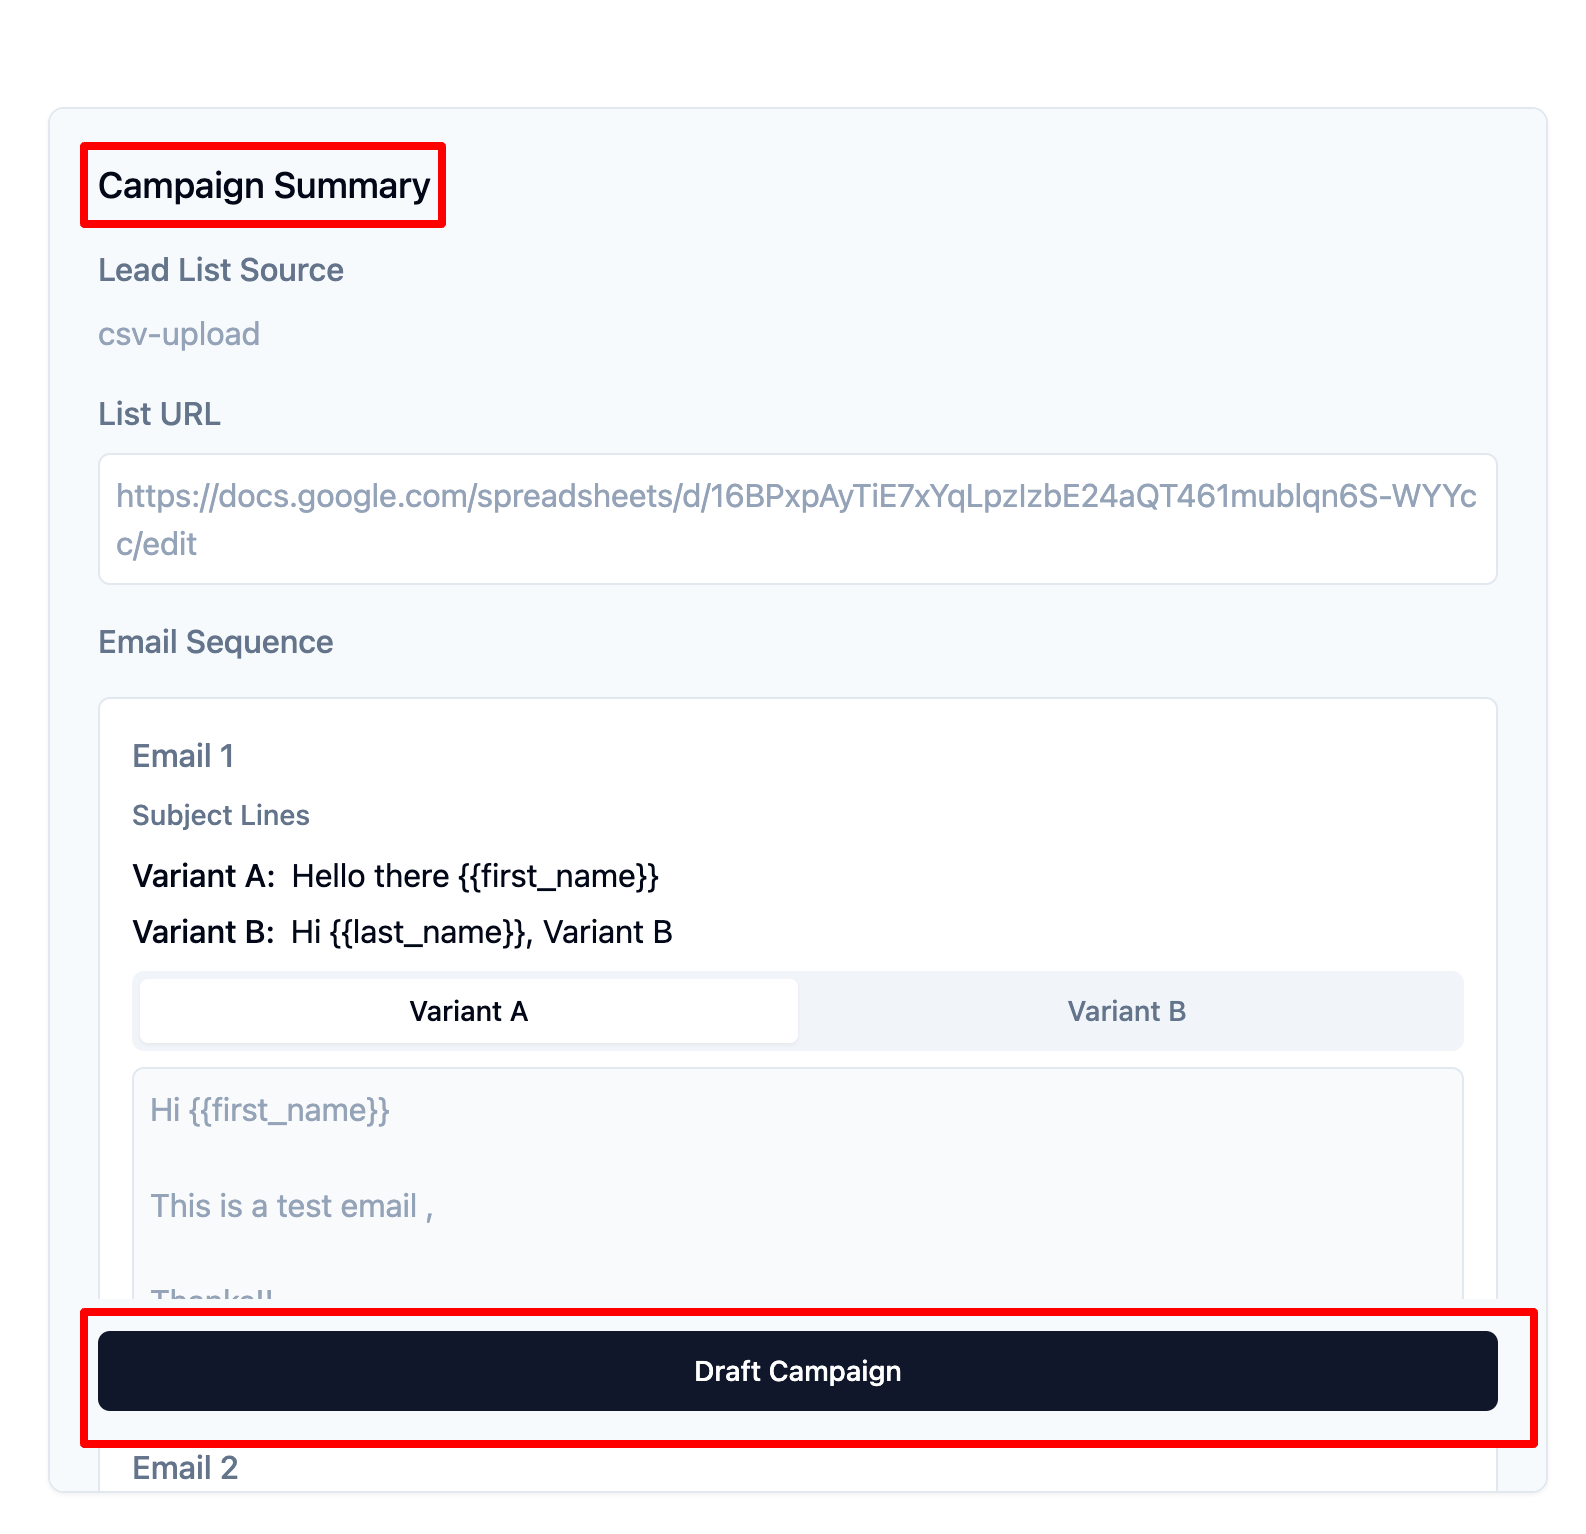
Once you cross-verify everything, you can click on Draft Campaign
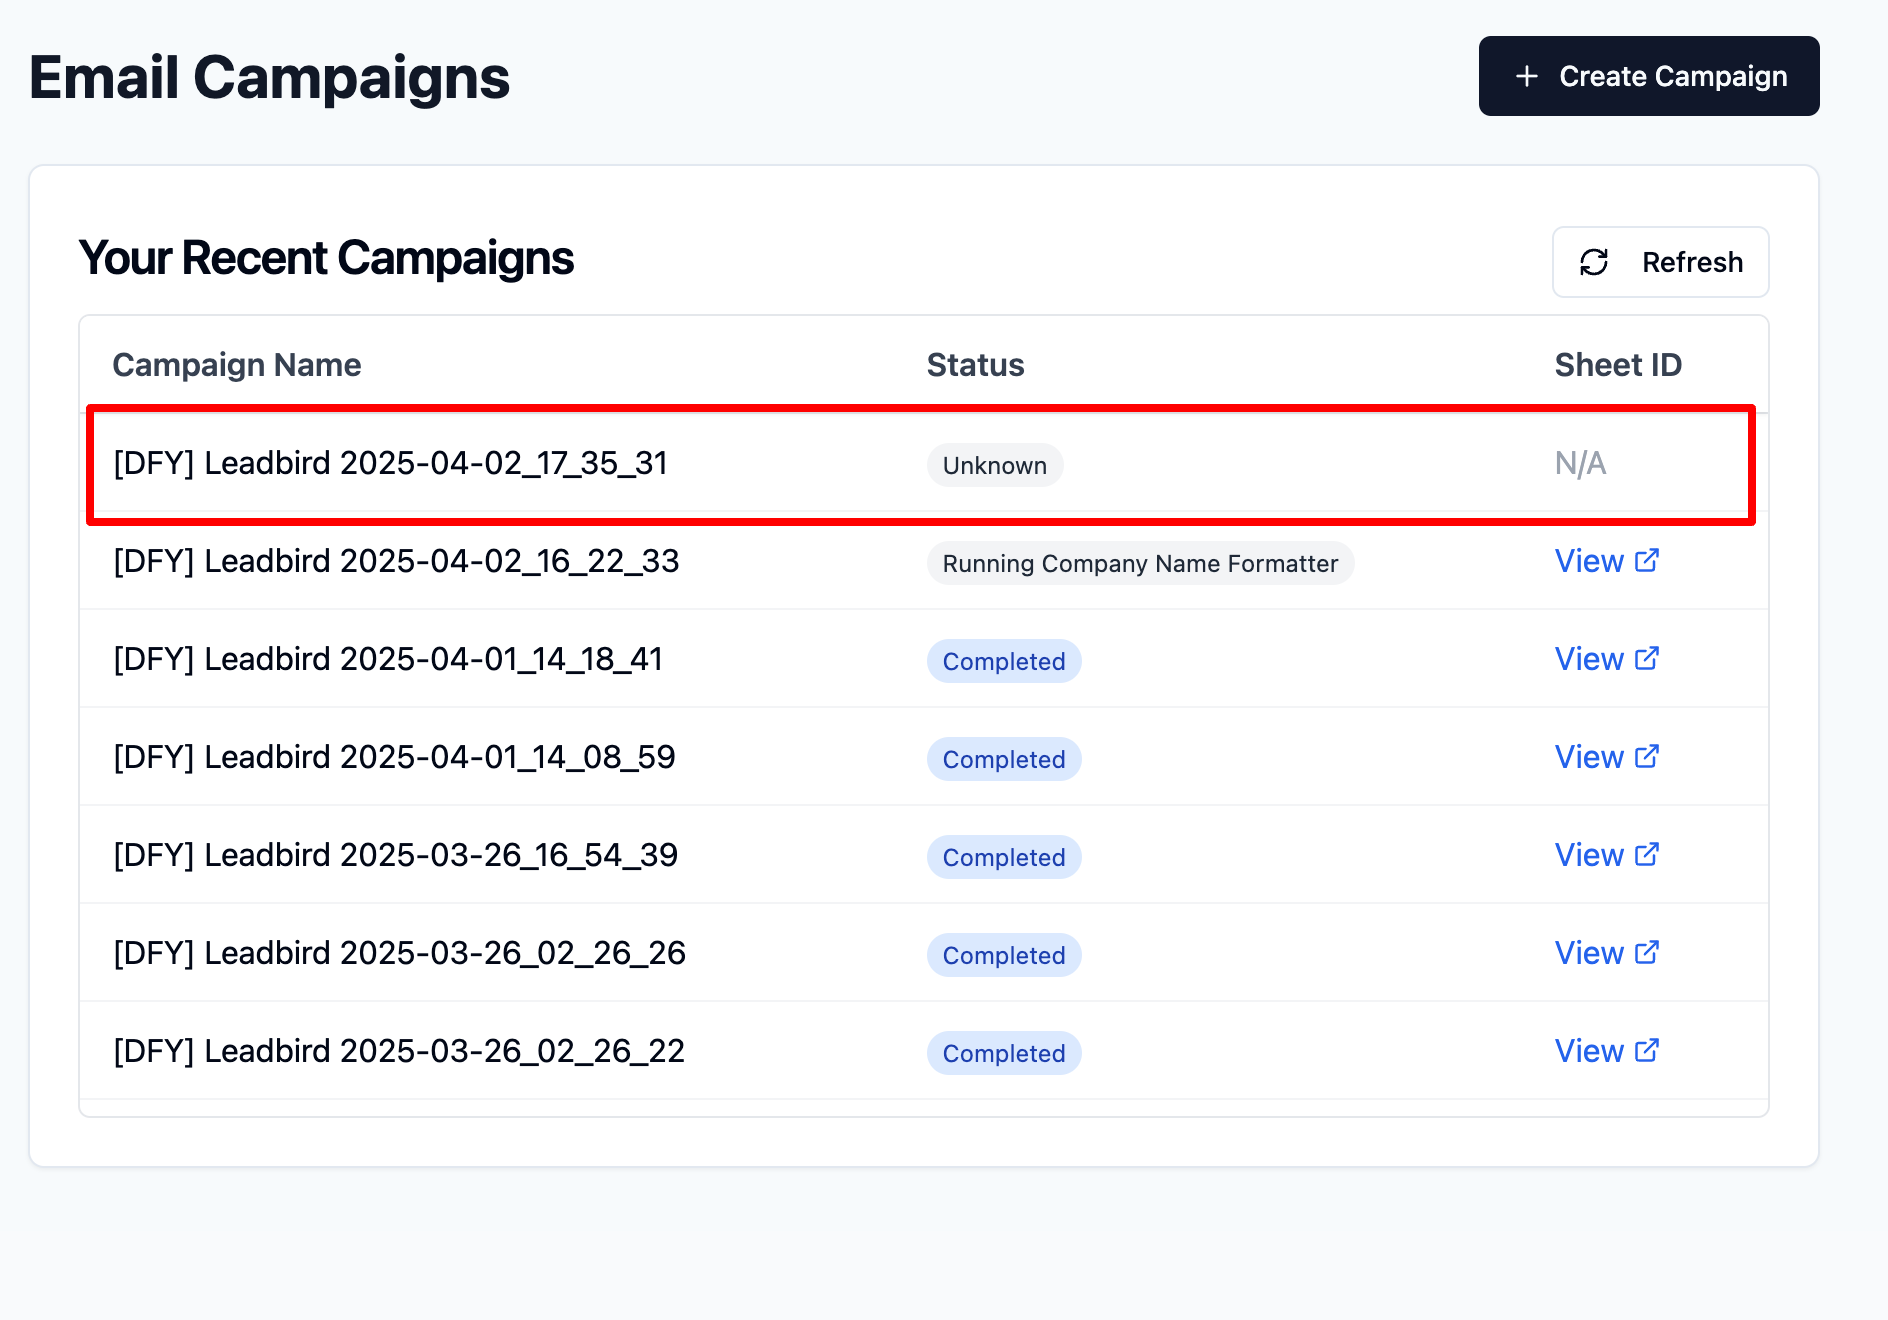
That’s it, You will see your campaign status under “Your Recent Campaigns” .
Wait for the status will turn “completed” .
Important Note: If you submit a campaign incorrectly, you cannot cancel the submission. However, after the campaign is drafted, you can simply delete it and submit a new one if needed.
The Dashboard is your mission control – a quick snapshot of your account.
Here’s what you’ll find:

Performance Overview → See Emails Sent, Reply Rate, Leads Submitted and Leads Credited.
Campaign Performance → Monitor your overall weekly campaign performance.
Onboarding Checklist → Track your onboarding checklist if you are good to launch your 1st campaign.
 Tip: Always check your Onboarding Checklist first before launching your 1st campaign.
This is where all drafted campaigns appear after submission.
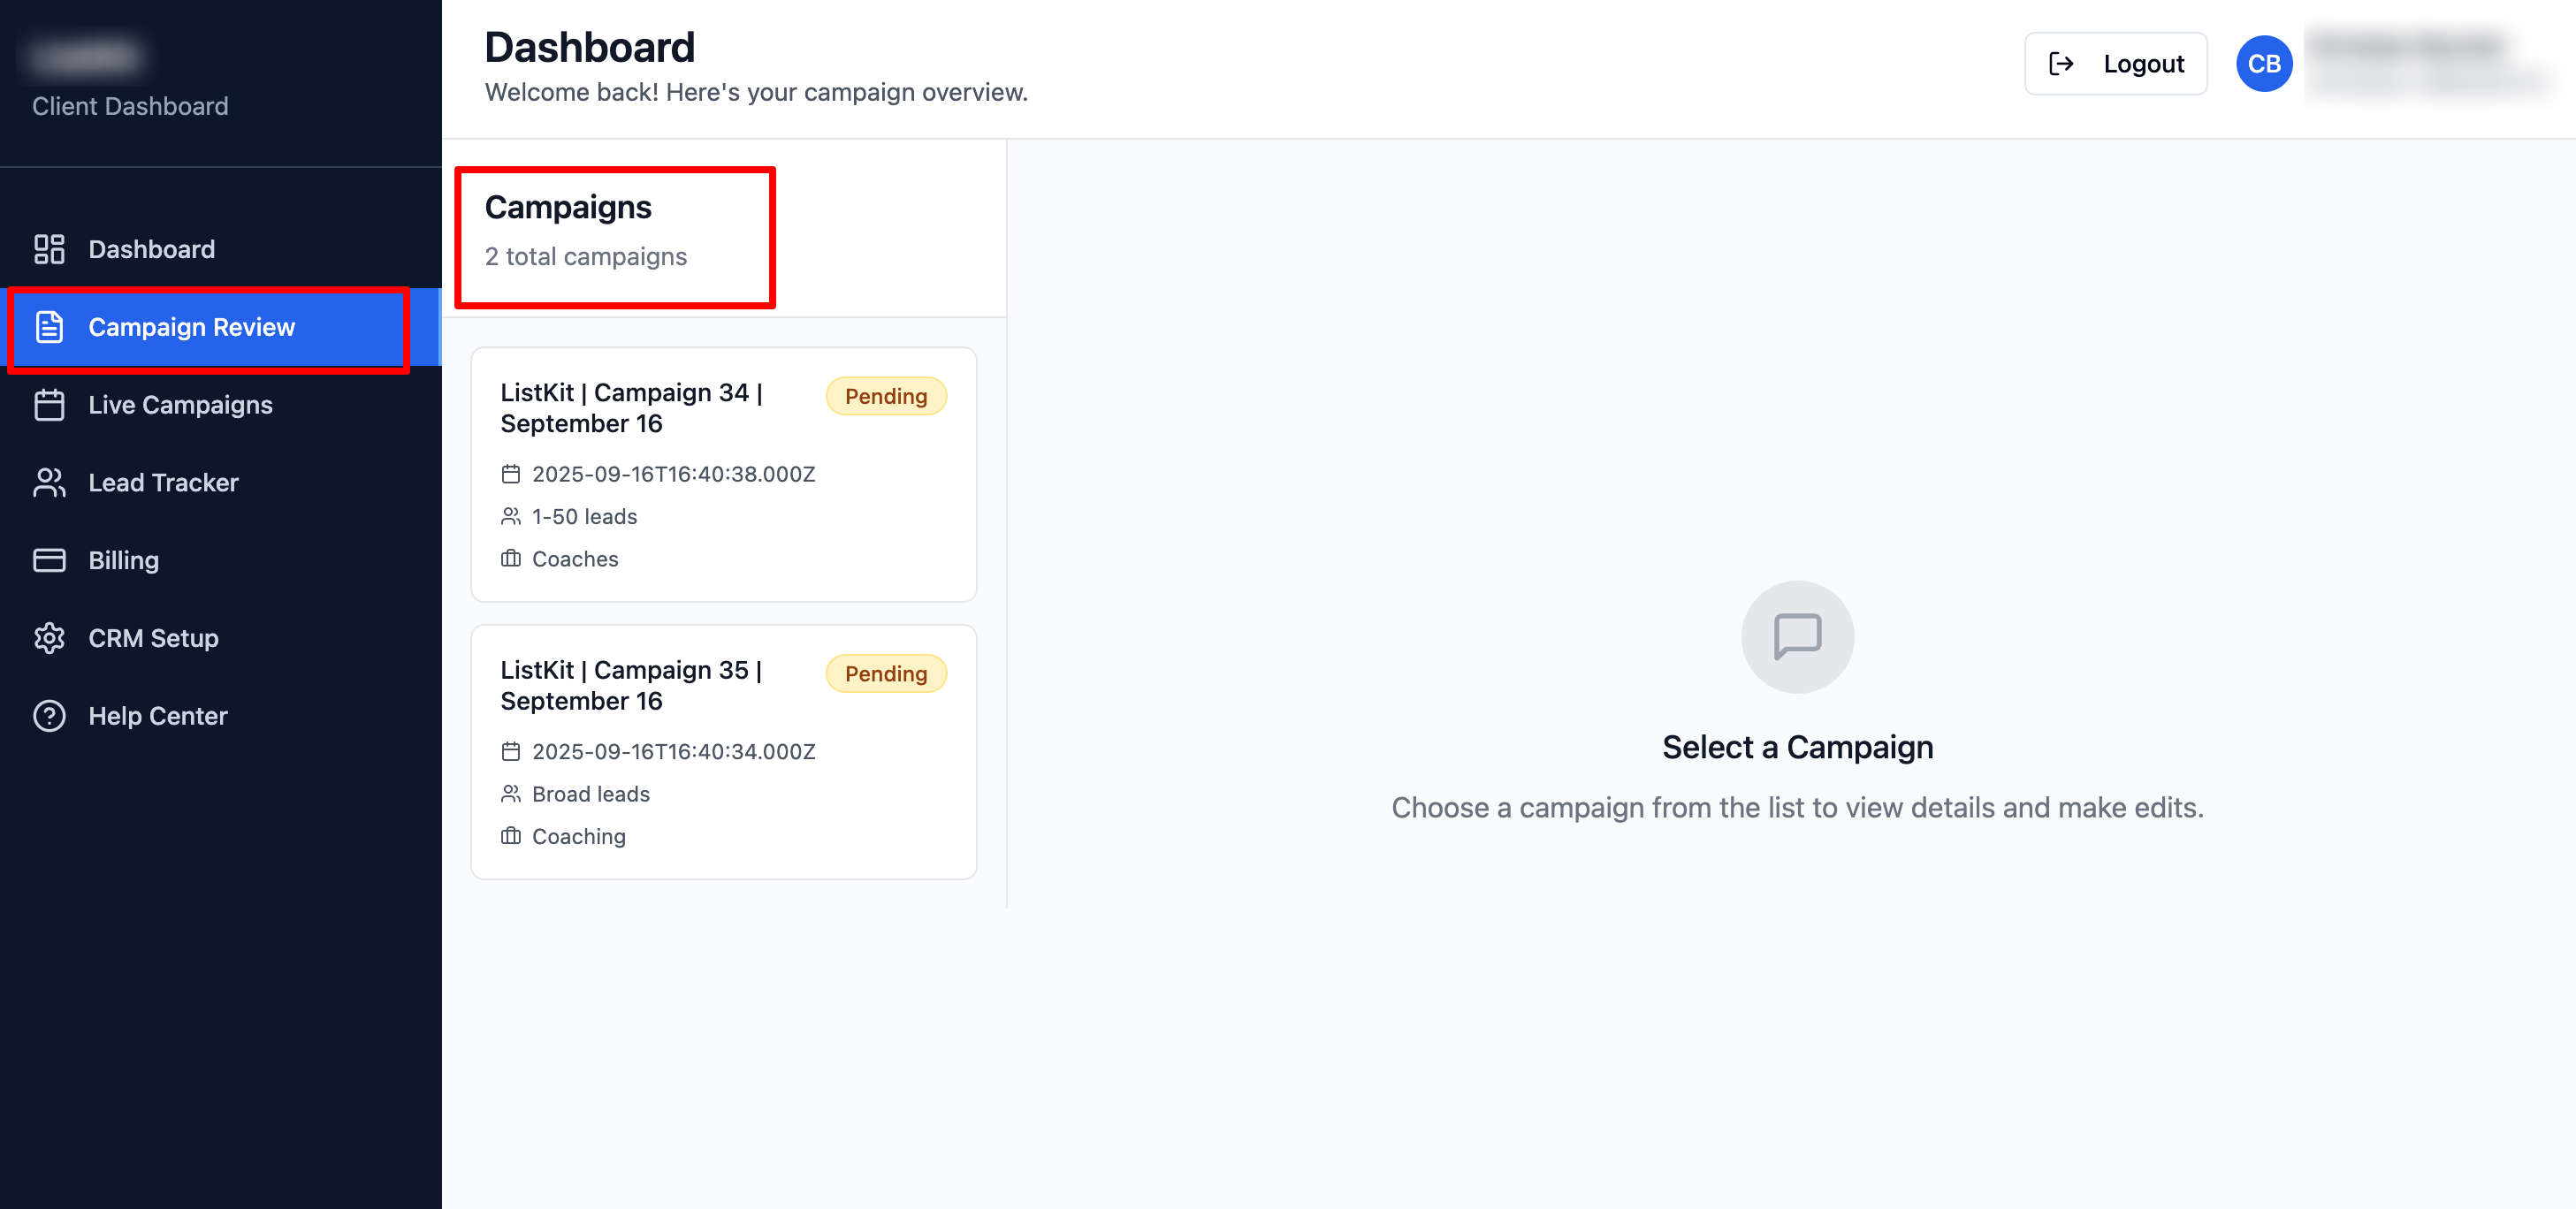
What you can do here:
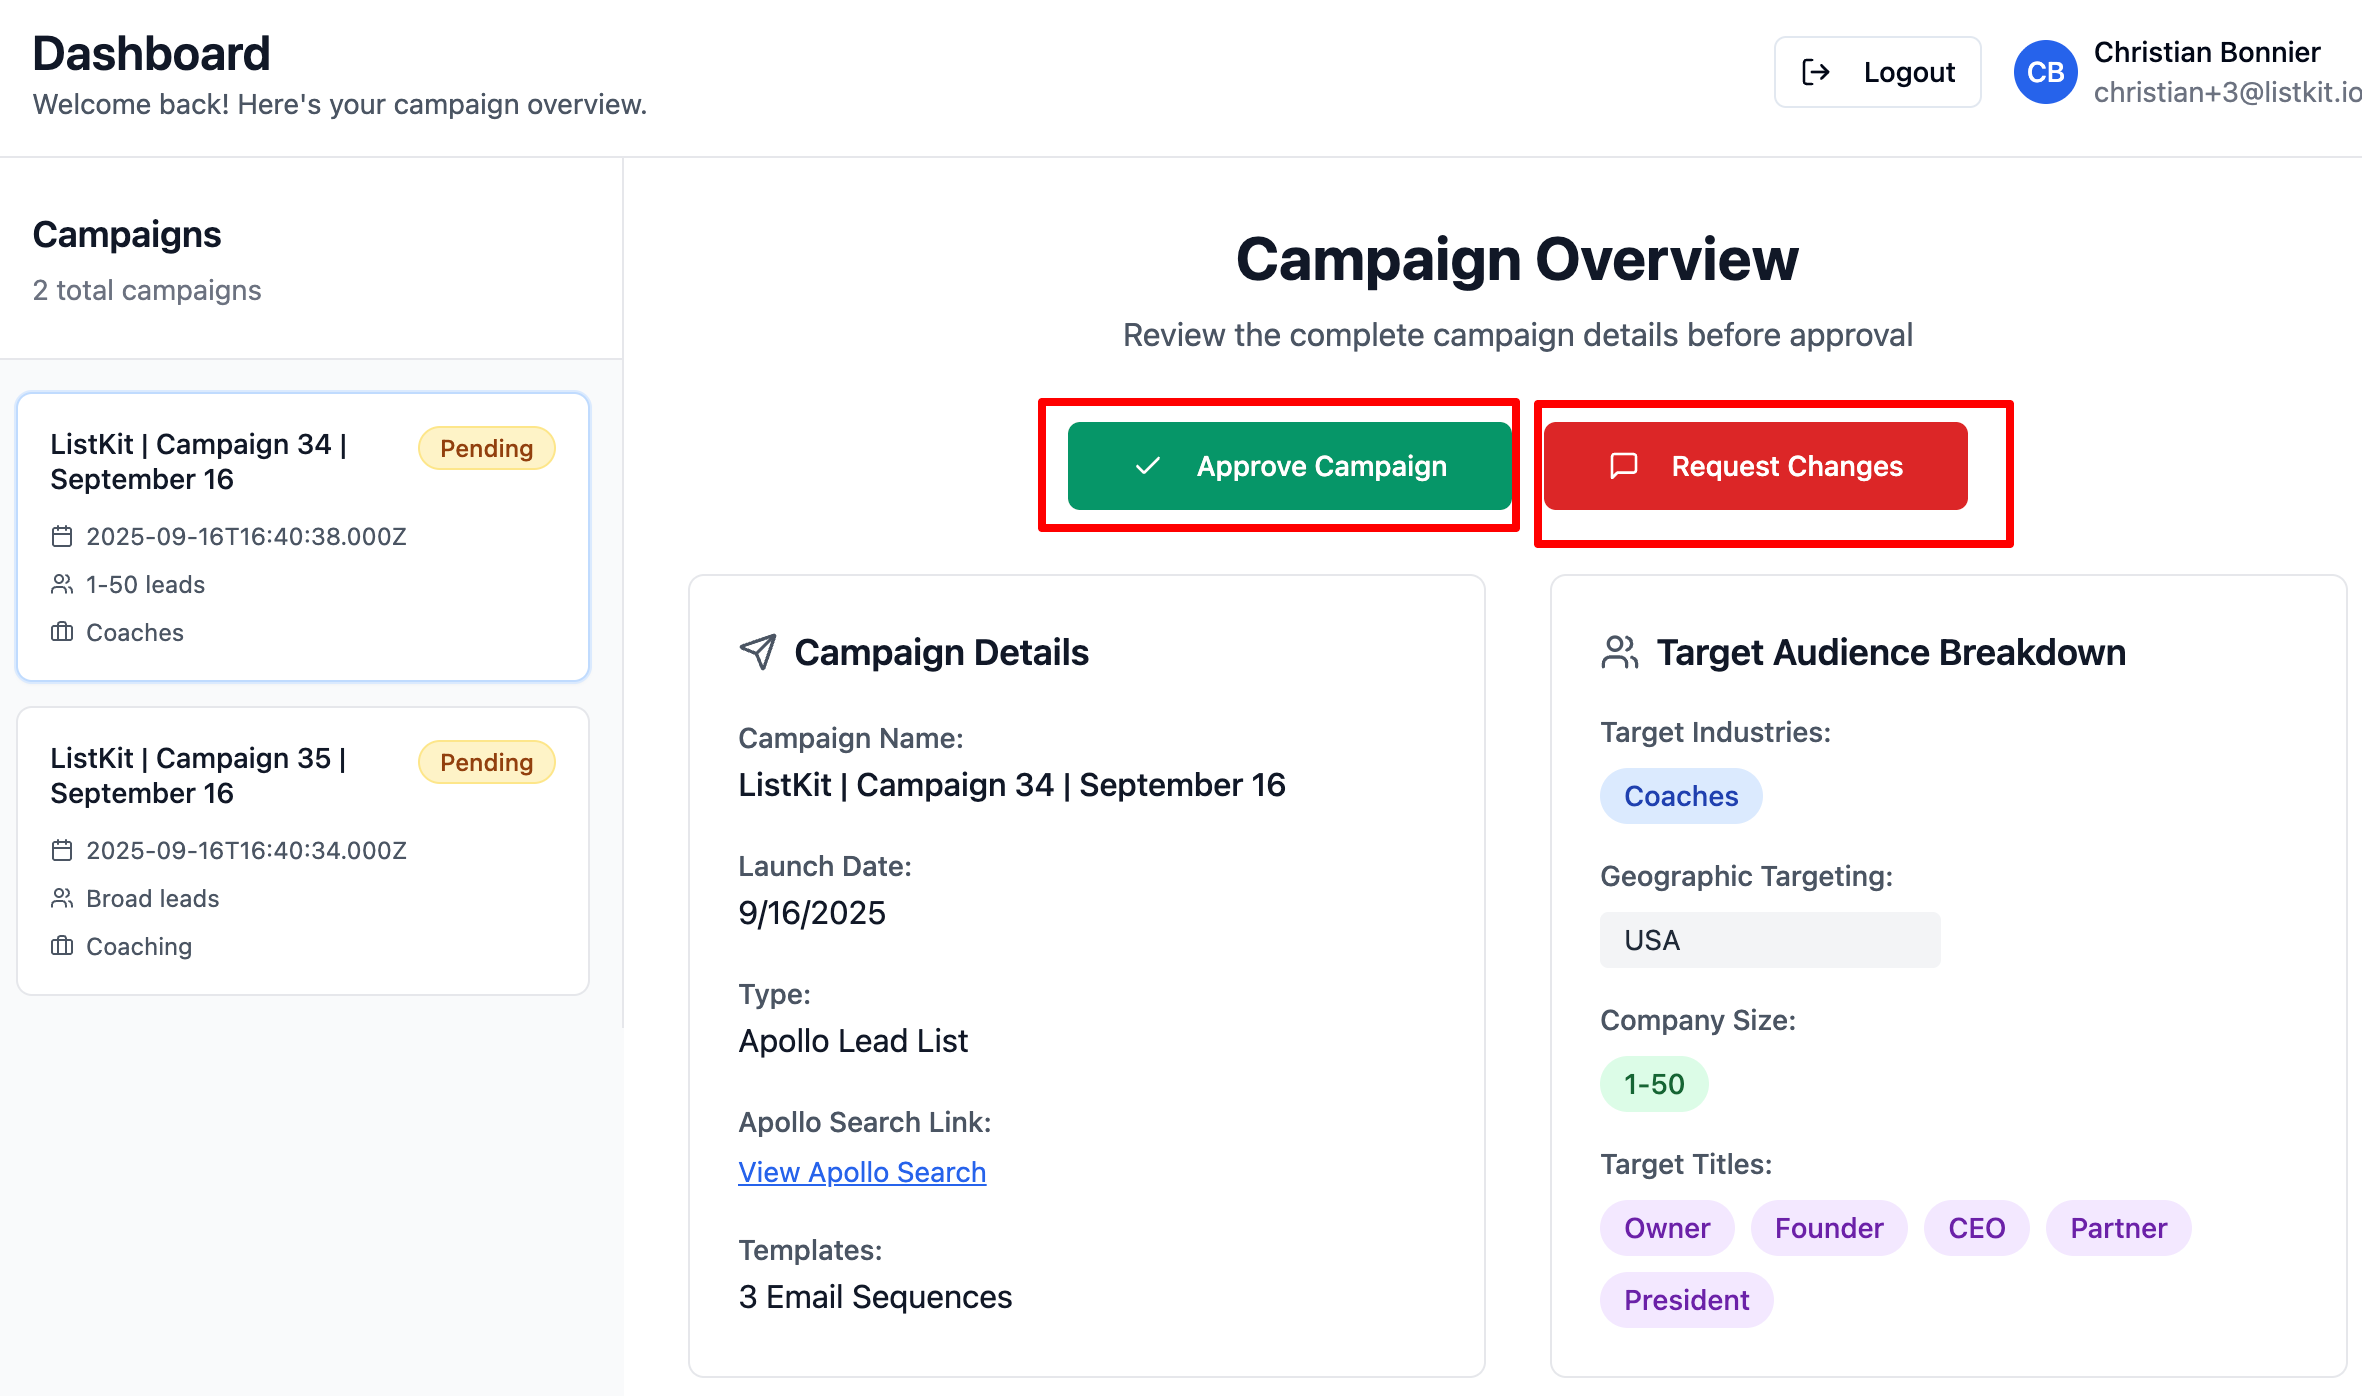
Approve or Request Changes in your campaign in One click.
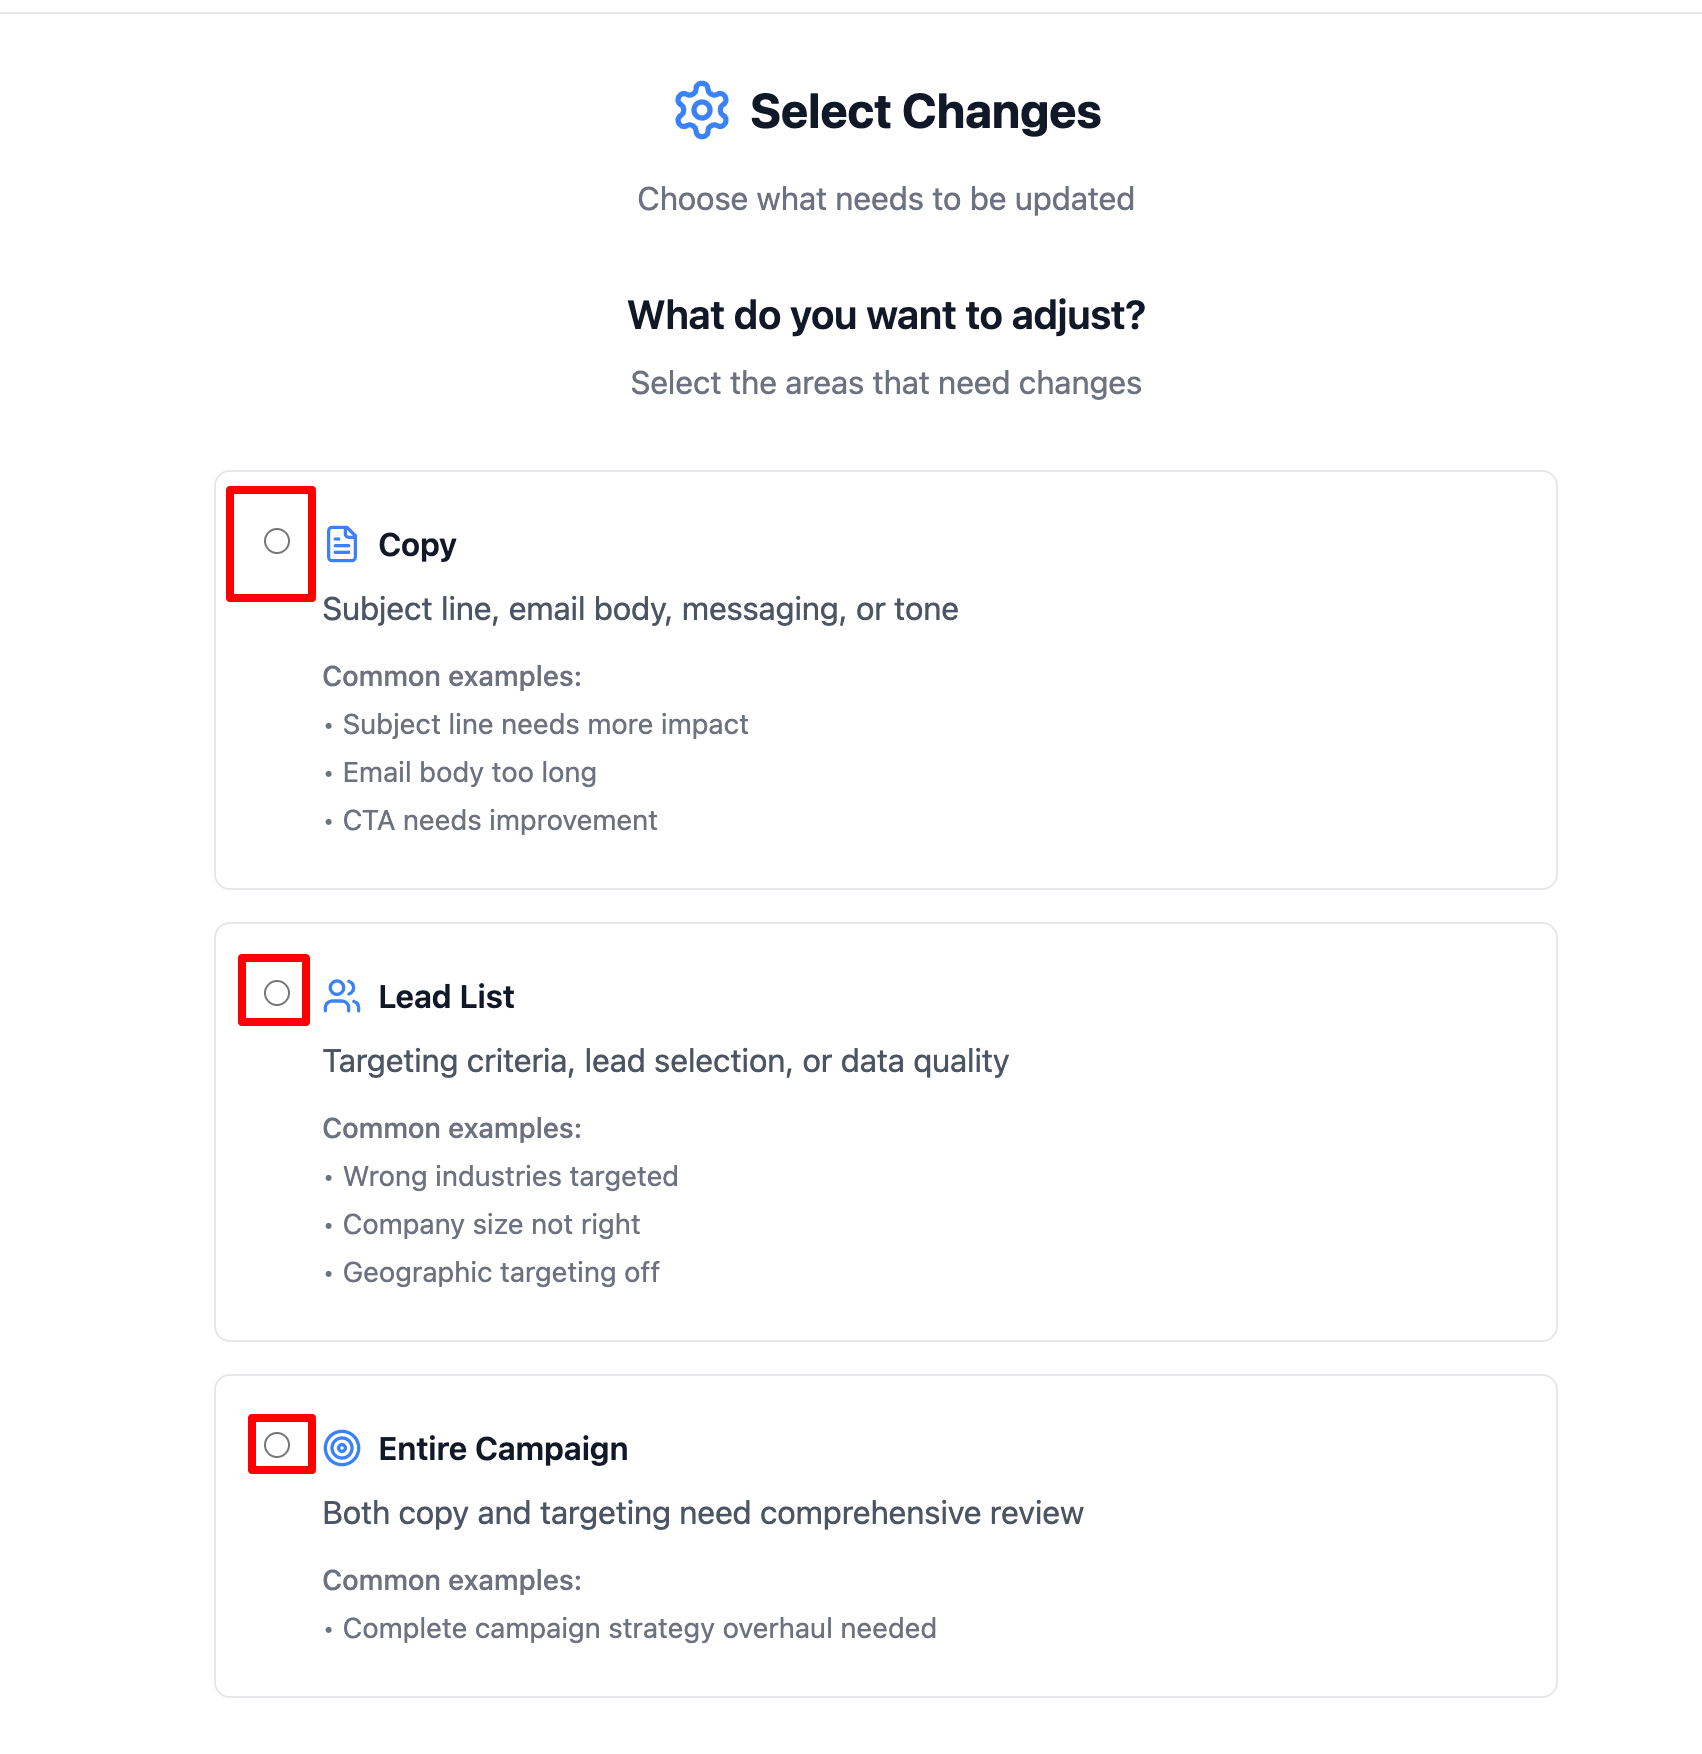
If you want to Request changes , just click on “Request Changes” and select what needs to be changed from the menu.
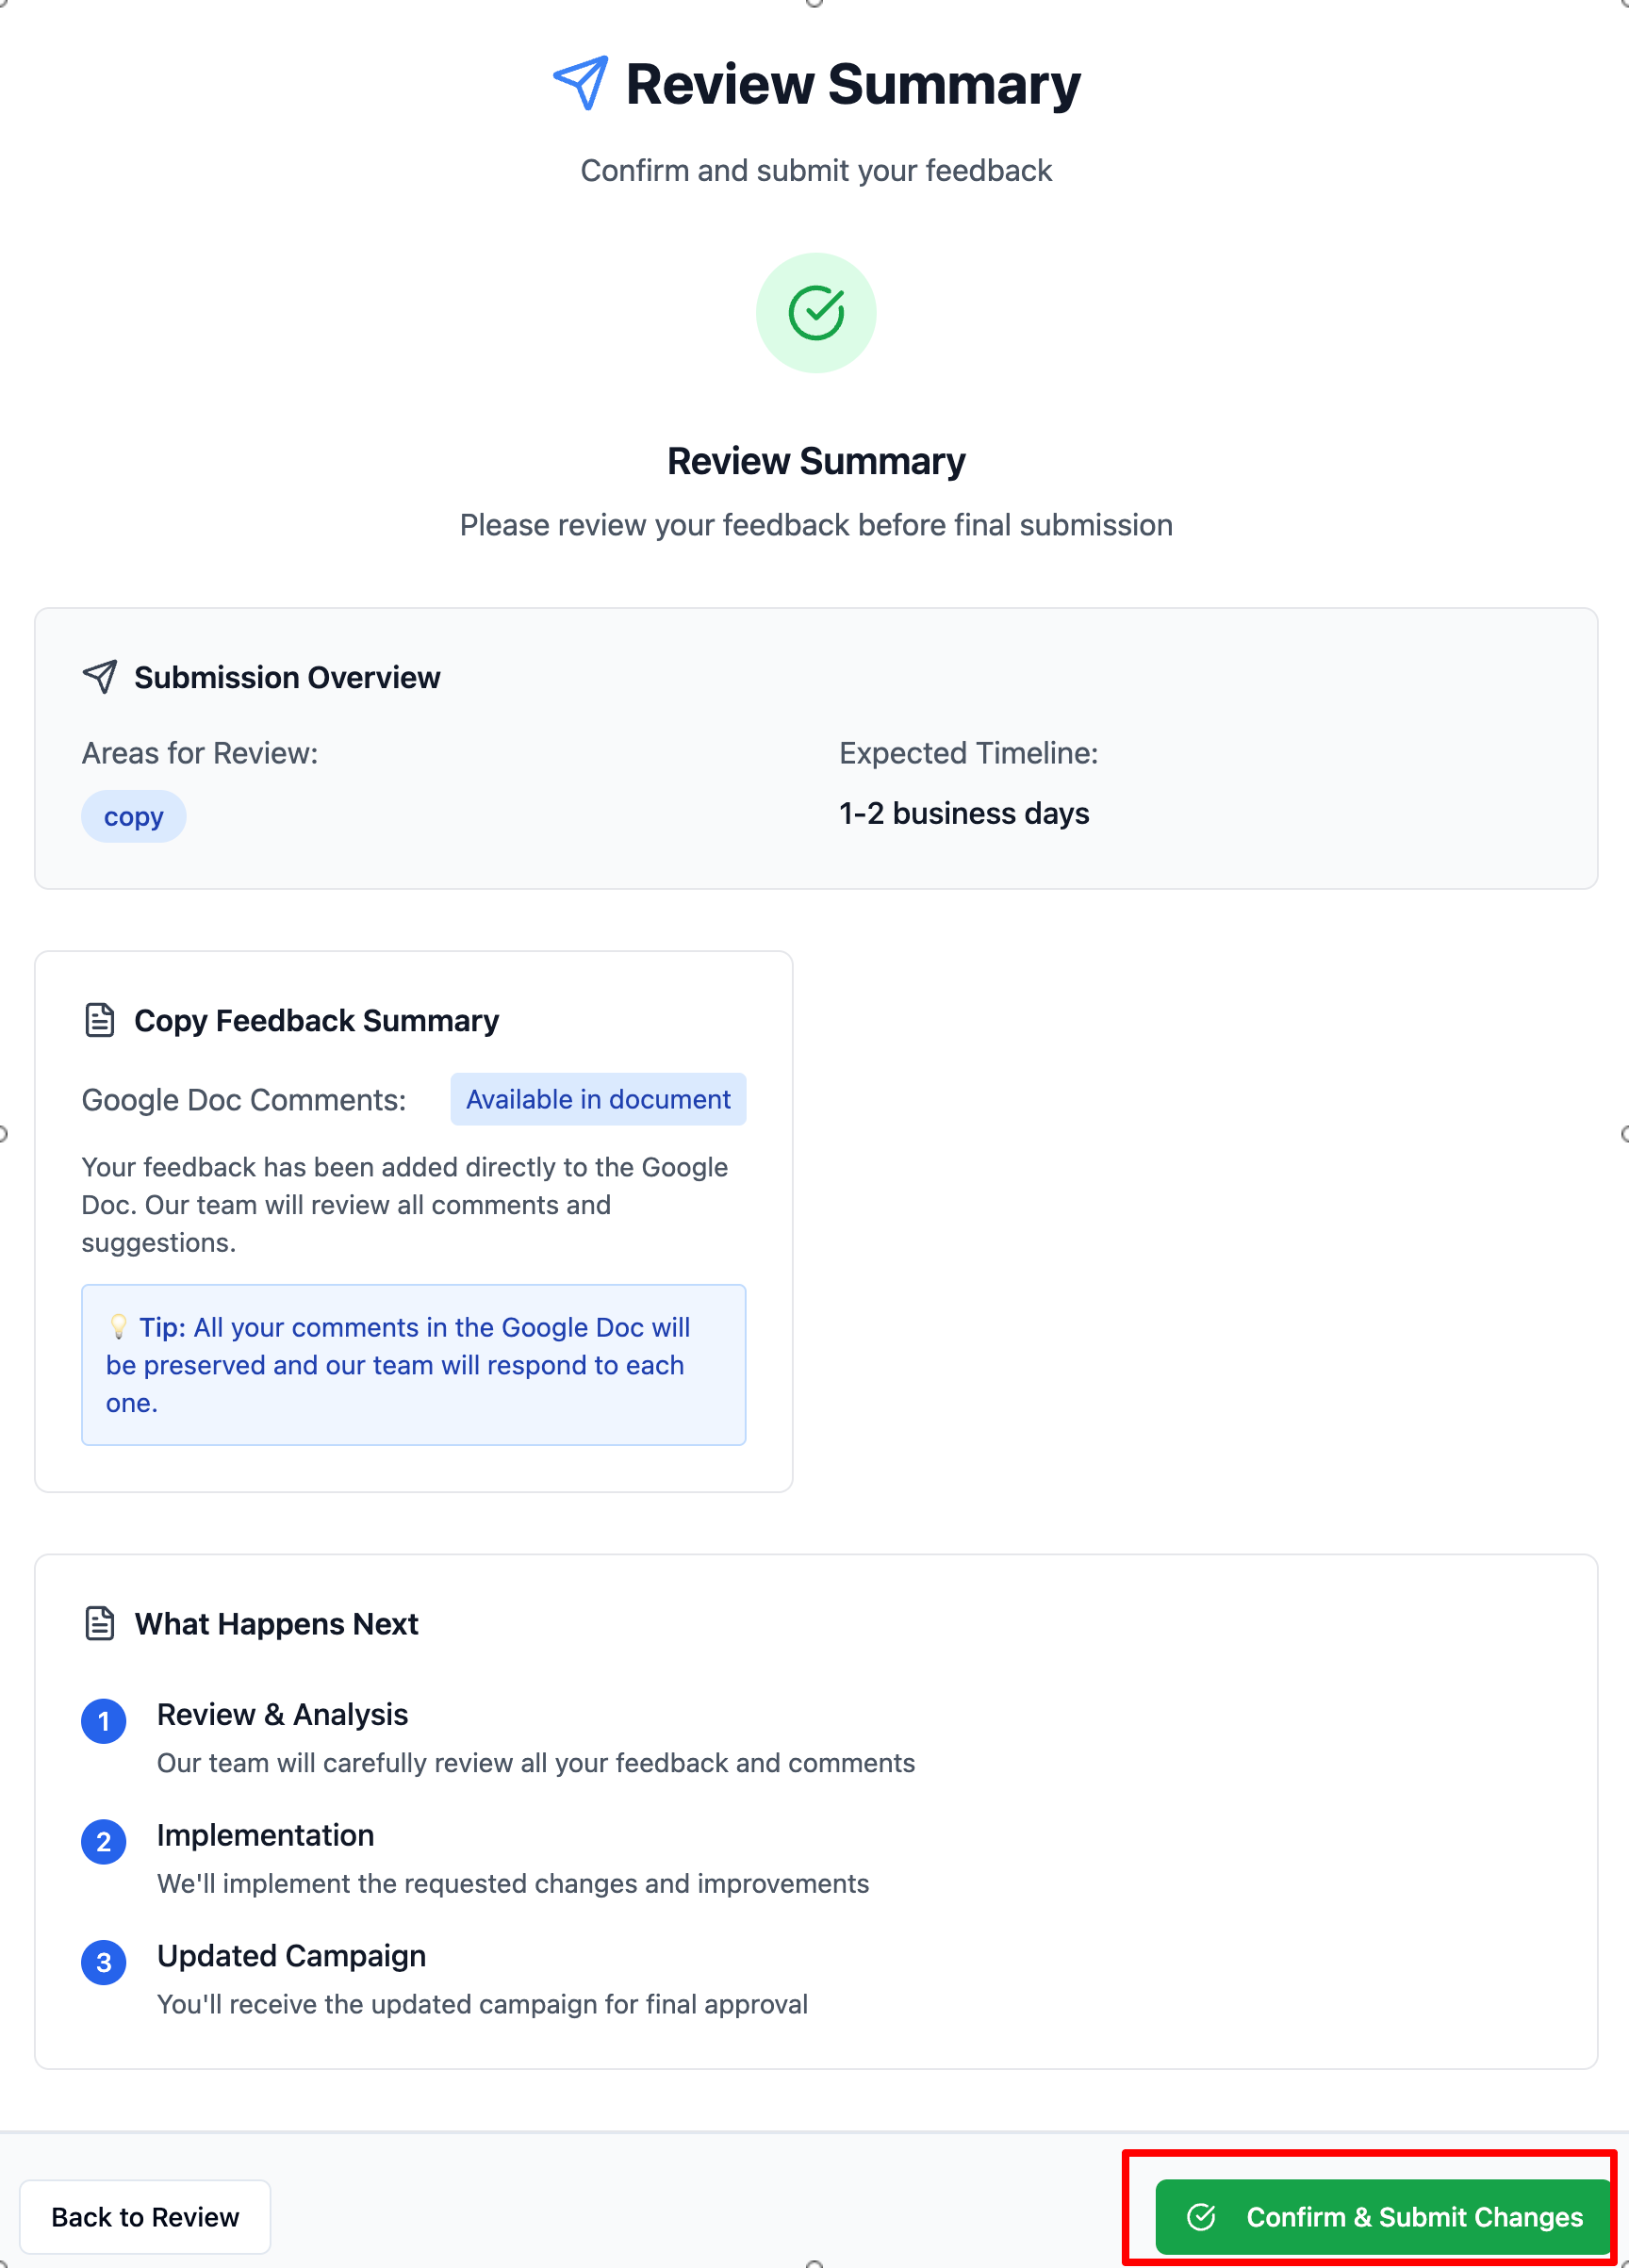
If its a Email Copy Review→ Provide your comments in the Email Copy and click “Review Summary”
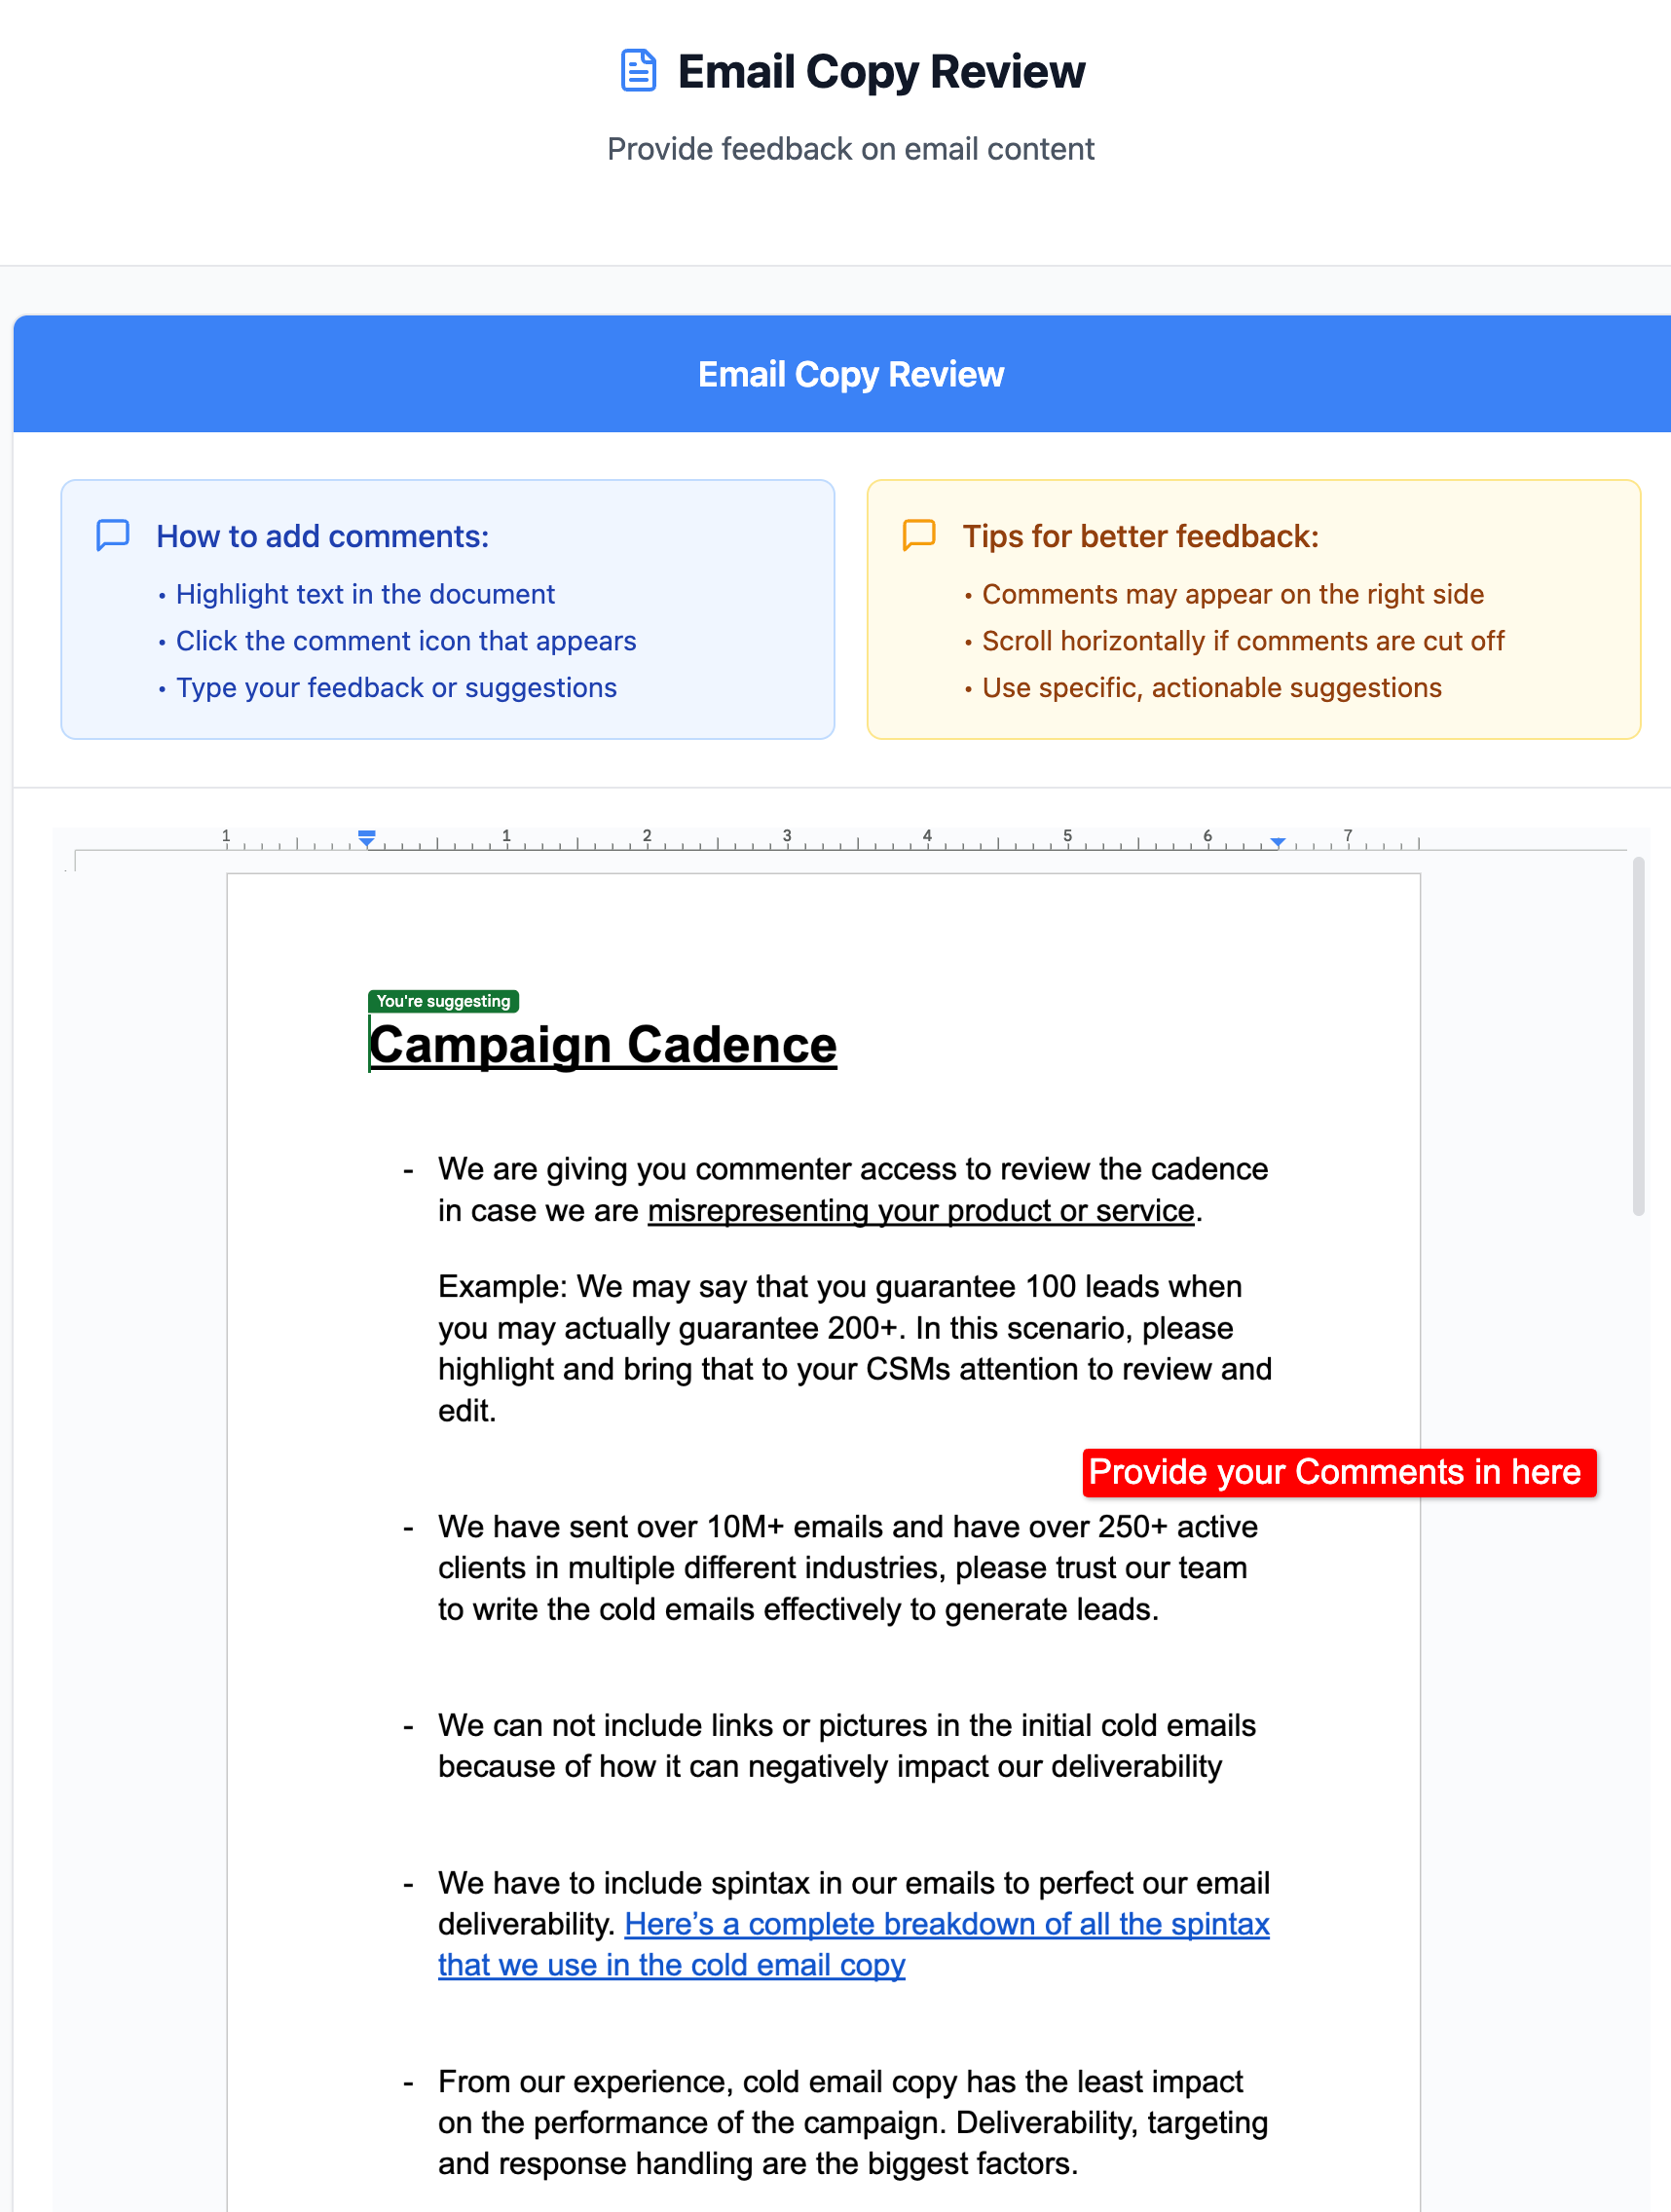
Verify your change request and if everything looks good, click on “Confirm and Submit Changes“
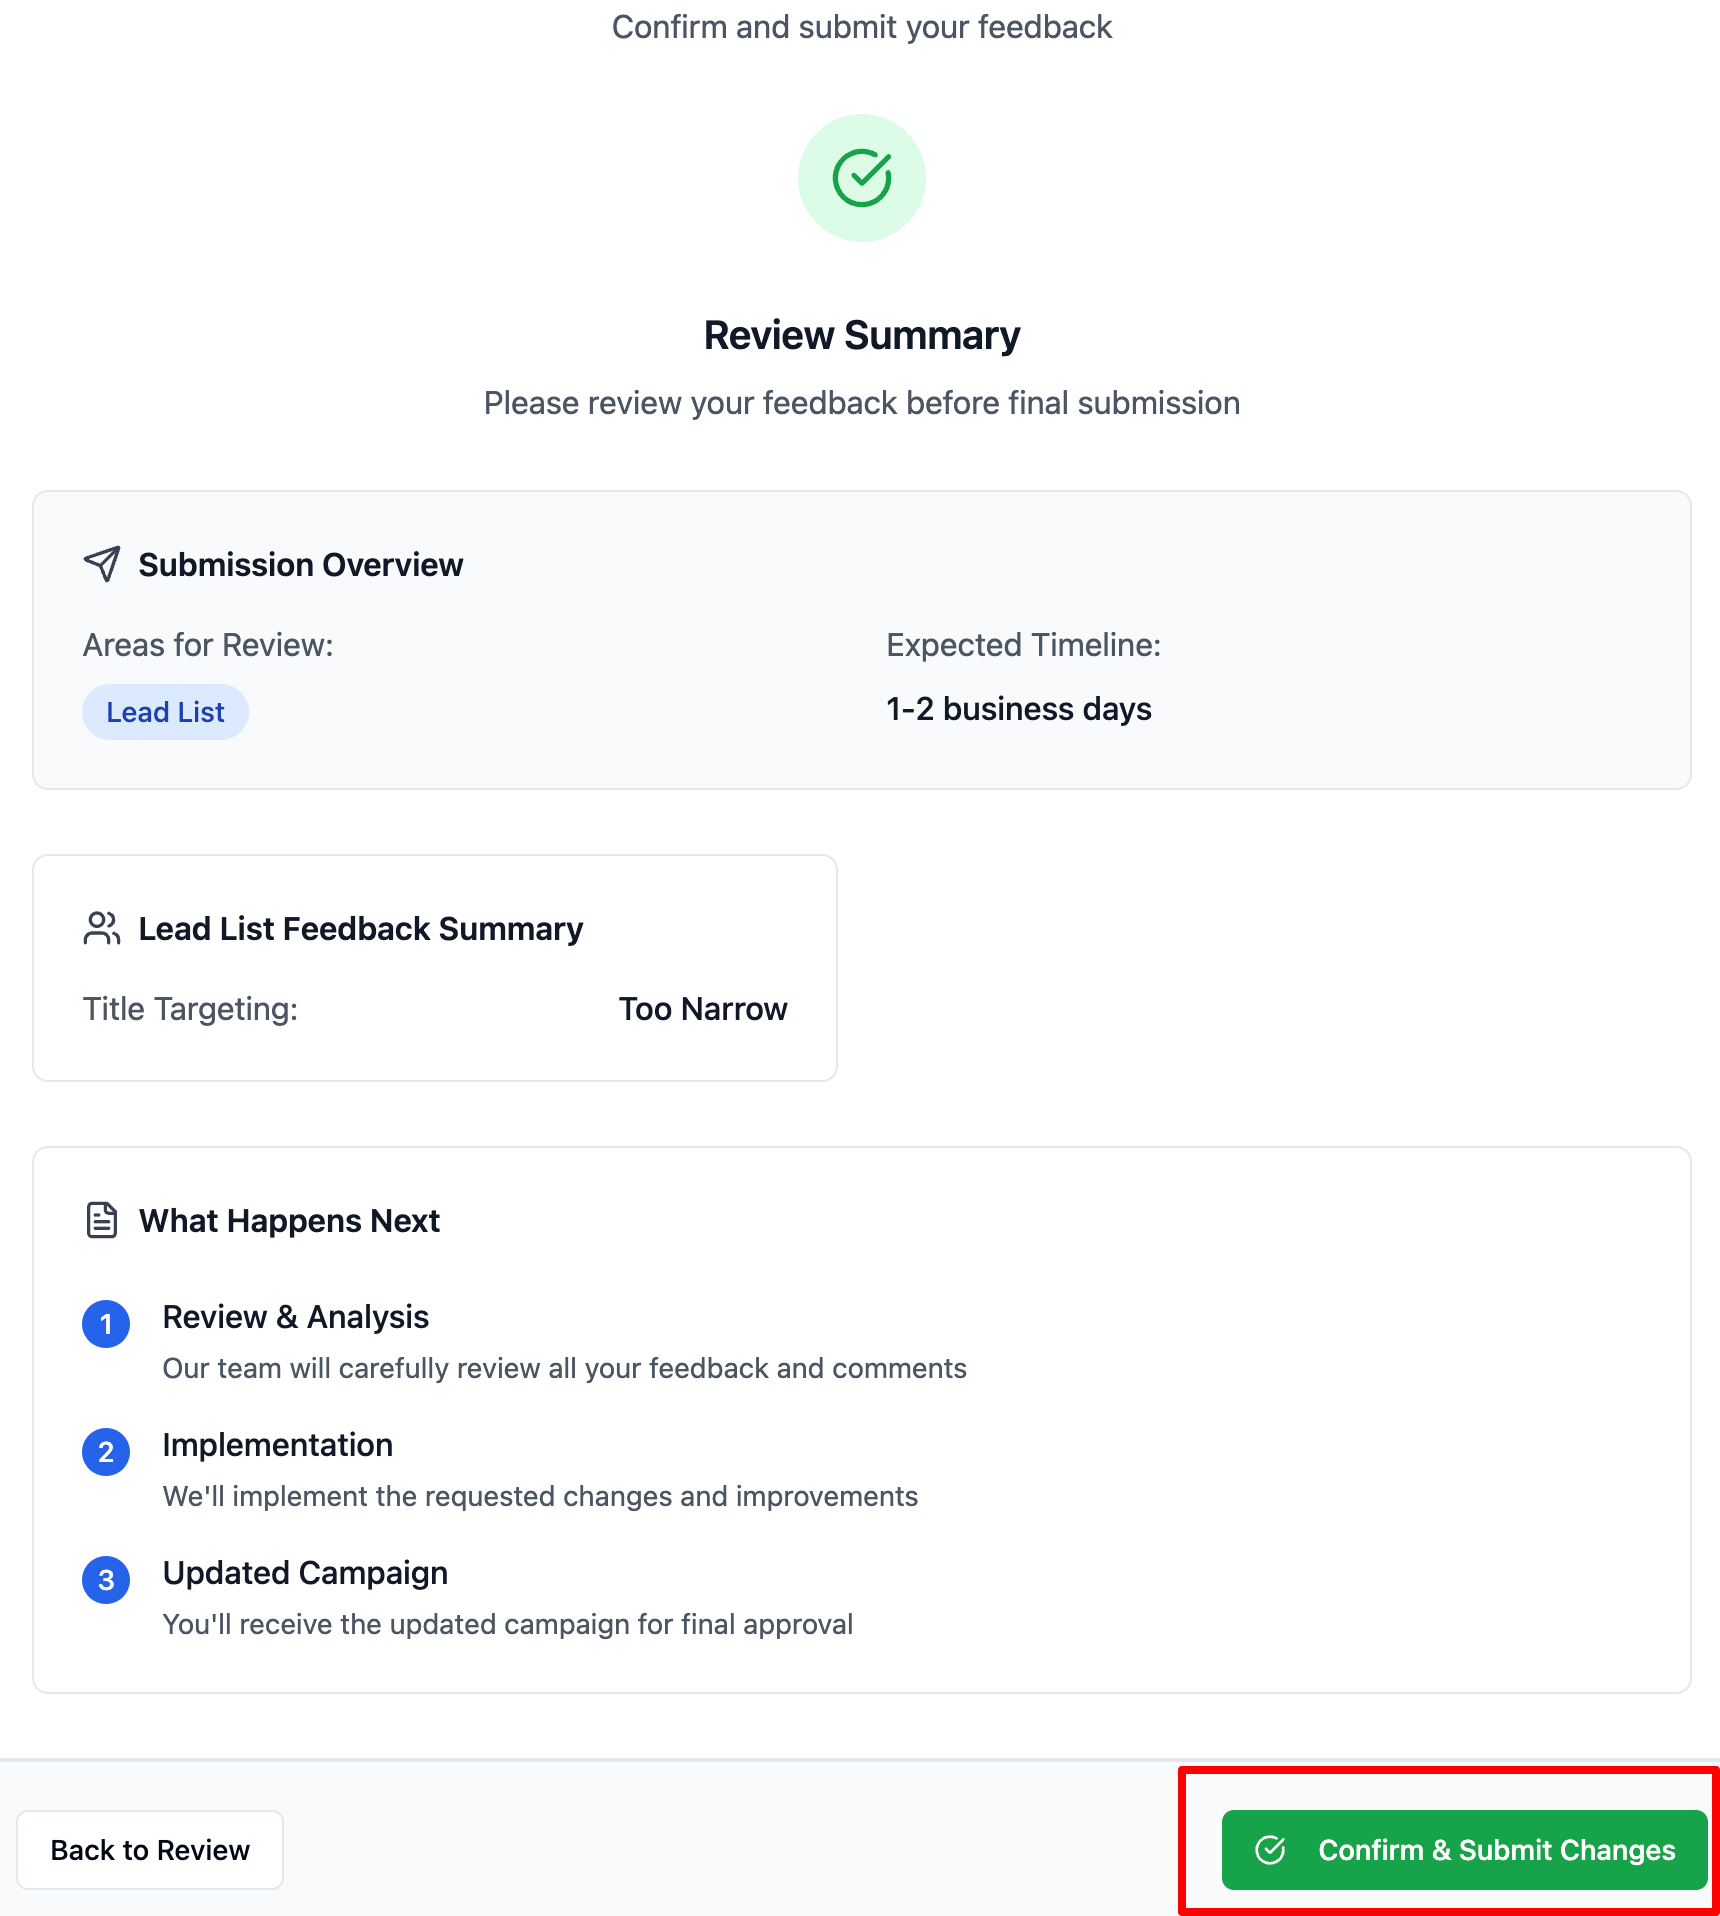
If its a Lead list feedback → Select what needs to be adjusted from the options and then click on “Review Summary”
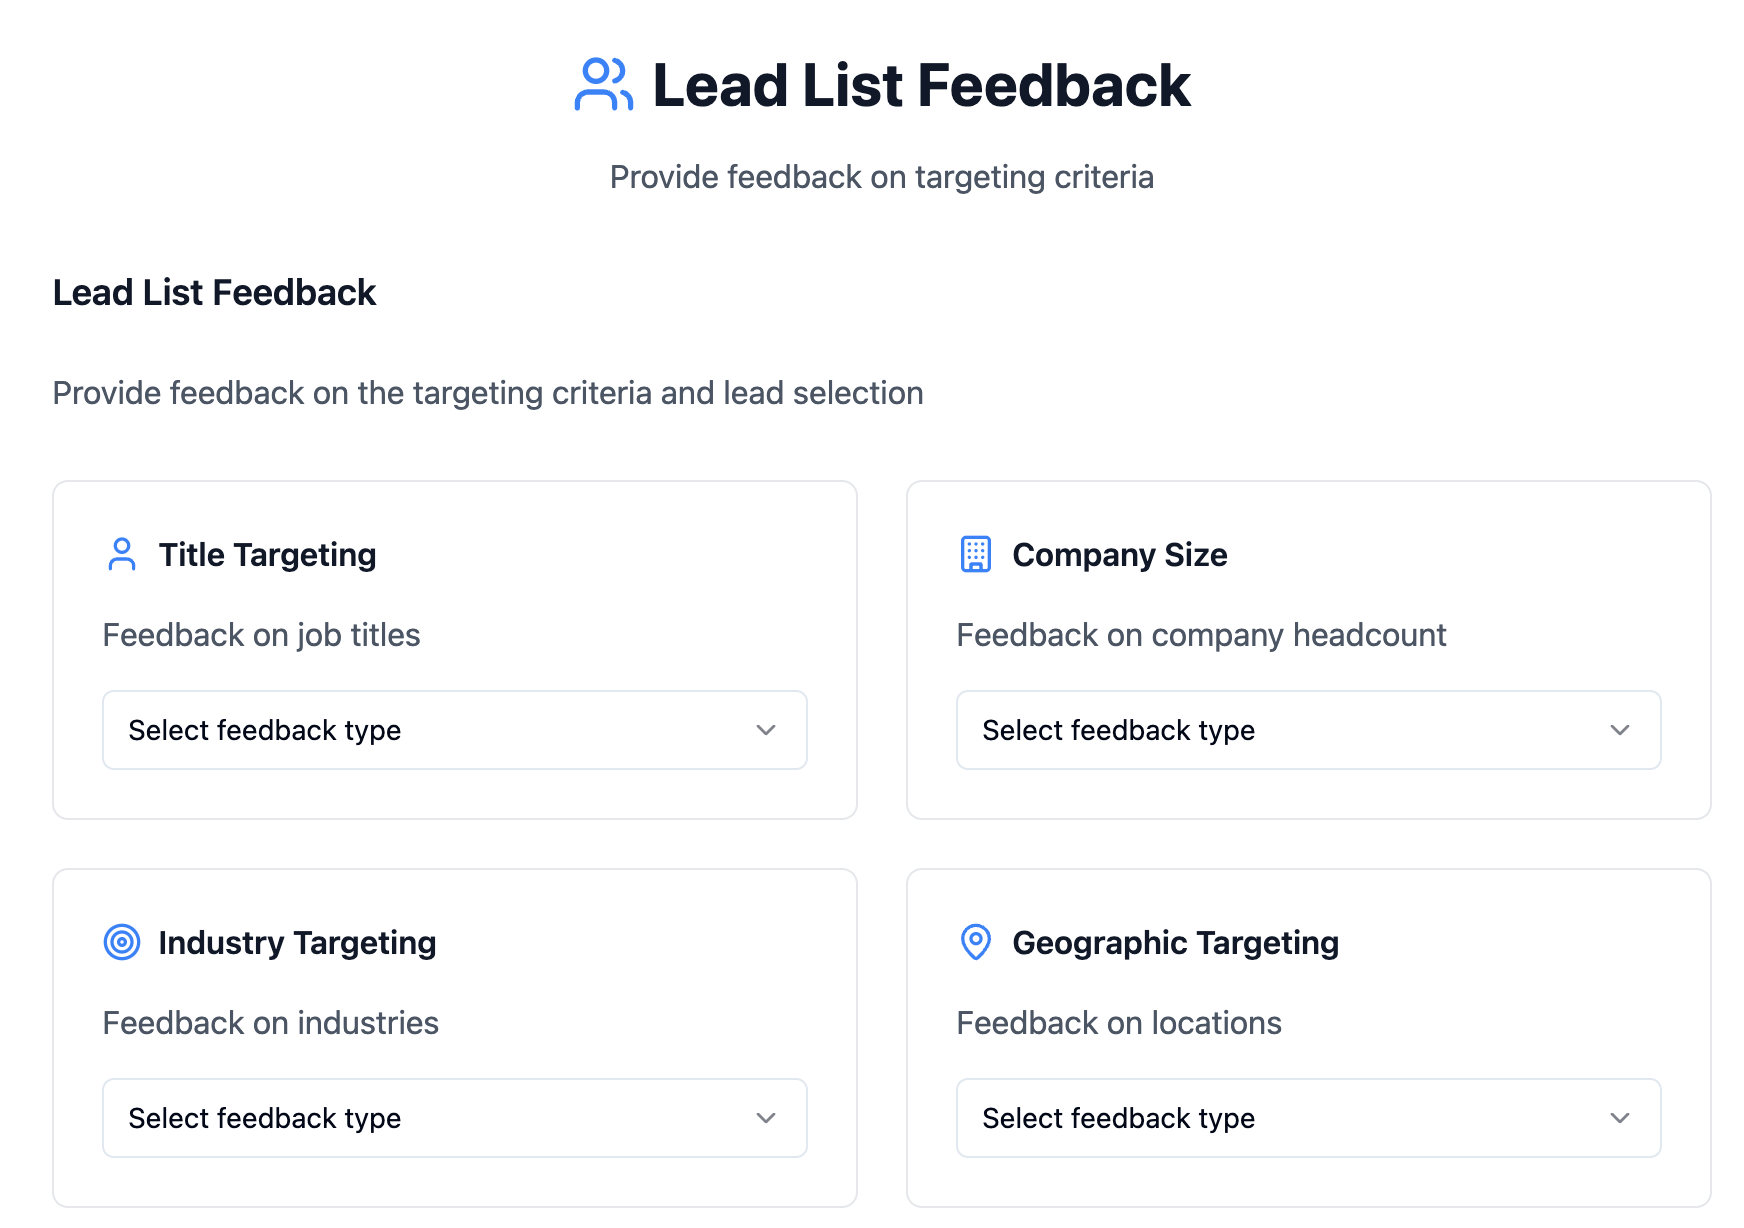
Verify your change request and ff everything looks good, click on “Confirm and Submit Changes“
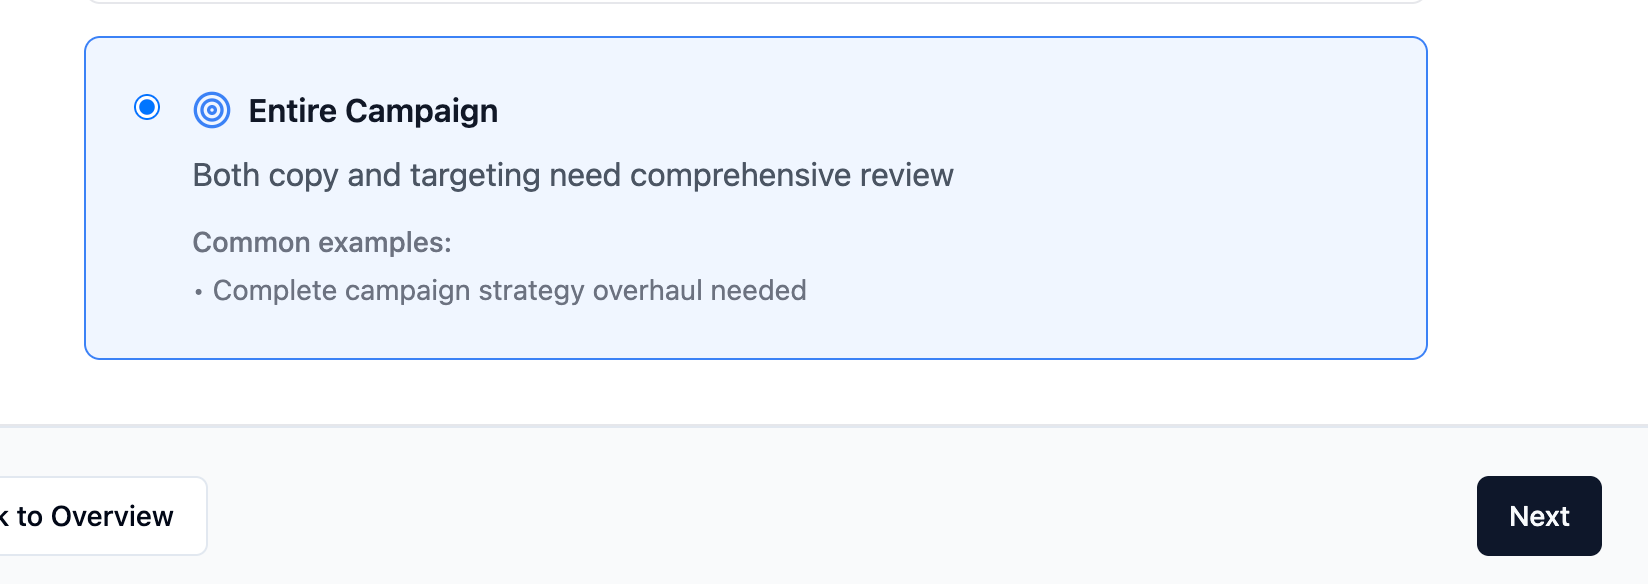
If its Entire Campaign→ Click on the third option and then provide your feedback for the Email Copy + Lead List
This section shows all your campaigns(active/archive/stopped/paused).
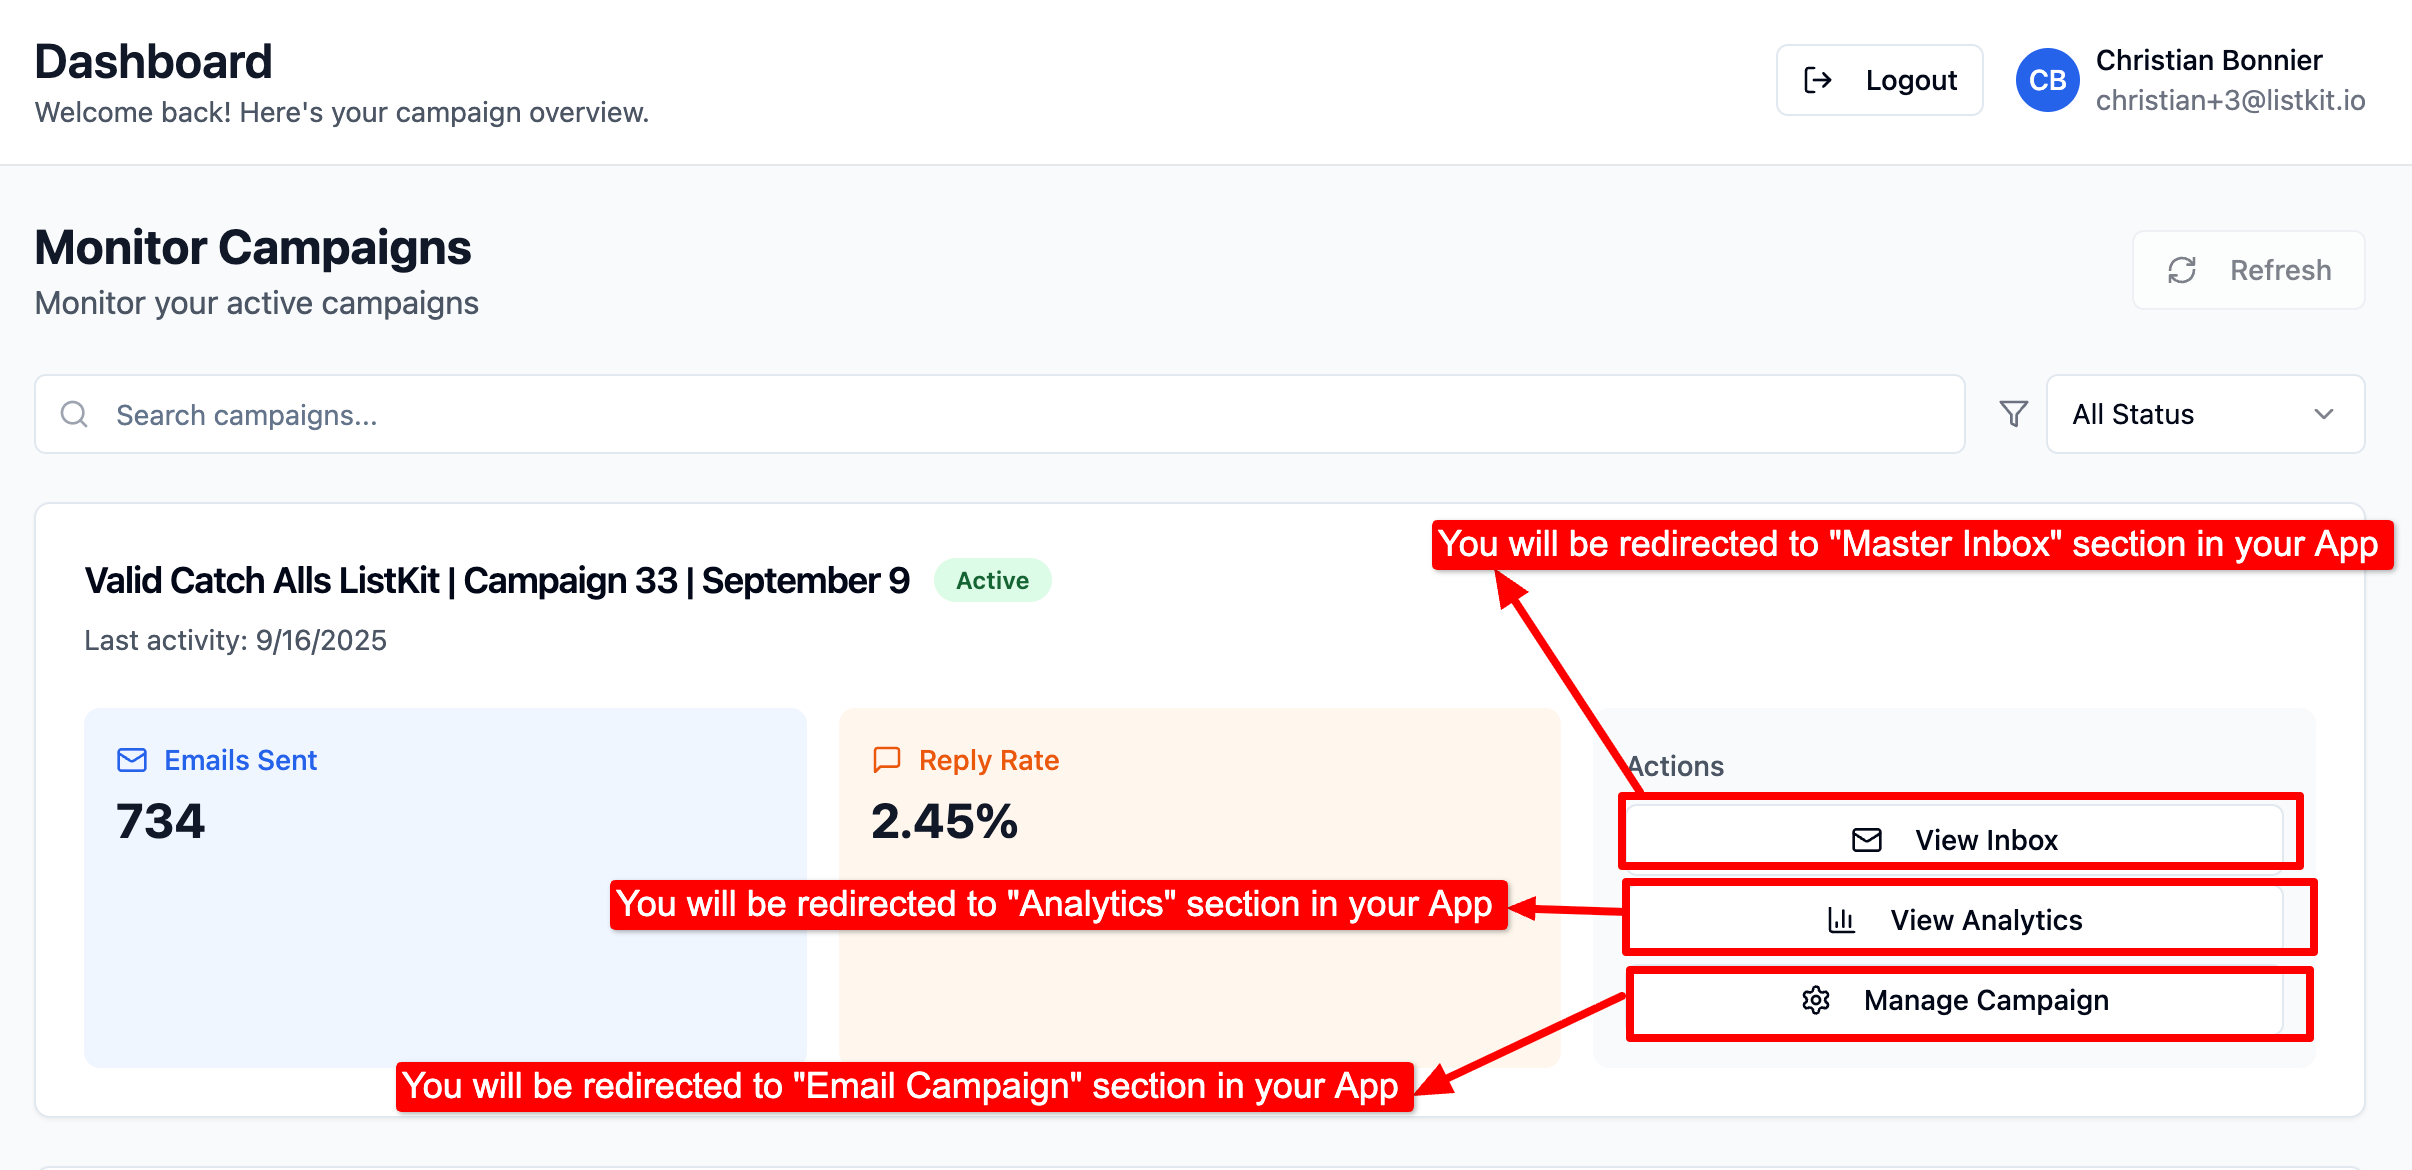
Key Actions:
View Inbox → Clicking this will re-direct you to Master Inbox section of your Application Dashboard from where you can view and manage your inbox.
View Analytics → Clicking this will re-direct you to Analytics section of your Application Dashboard from where you can track replay rate, Emails sent, positive reply rate, out-of-office replies. etc.
Manage Campaign → Clicking this will re-direct you to “Email Campaign” section of your Application Dashboard from where you can Edit/Pause/Stop/Update your campaign and its settings.
Best Practice: Avoid running multiple campaigns at once unless you split your credits wisely (e.g., 2,500 leads per campaign if you want two active).
Your single source of truth for all Interested leads across campaigns.
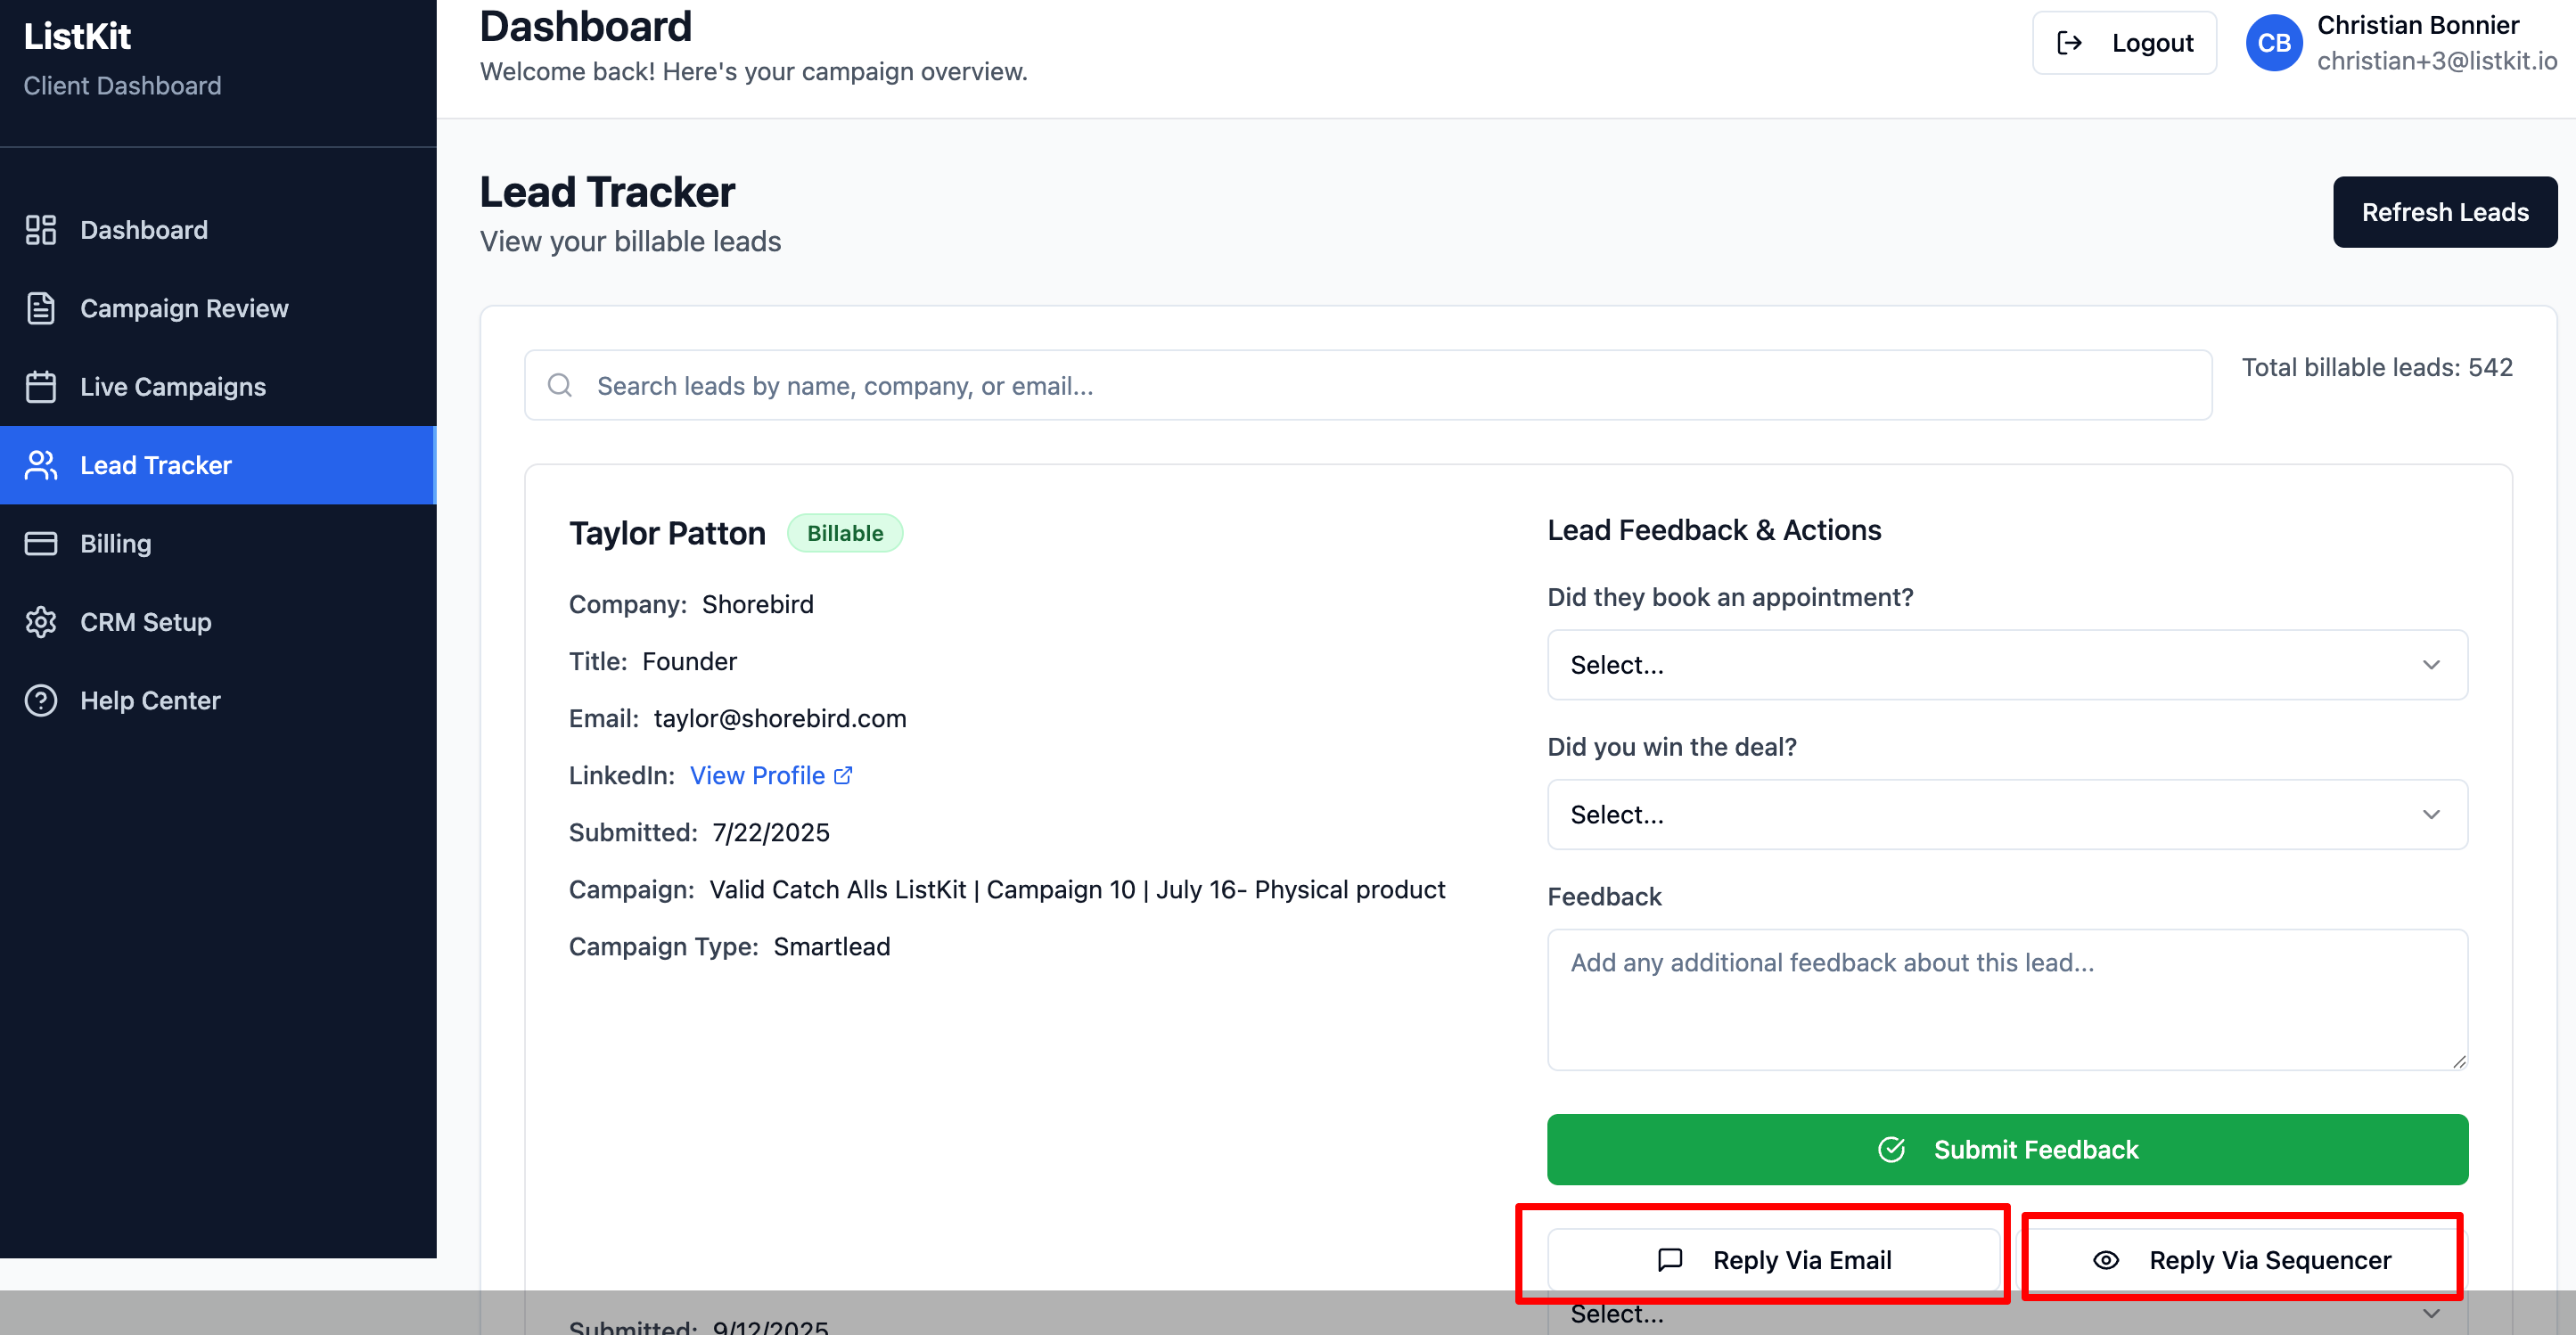
Here’s what you can do:
Submit Lead Feedback and Actions.
Reply Management (Reply via Sequencer) → Opens the Master Inbox to directly respond to leads.
Reply Management (Reply via Email) → Opens the “Click to Reply: email to directly respond to leads via your email.
The Billing section manages your subscription and credits.
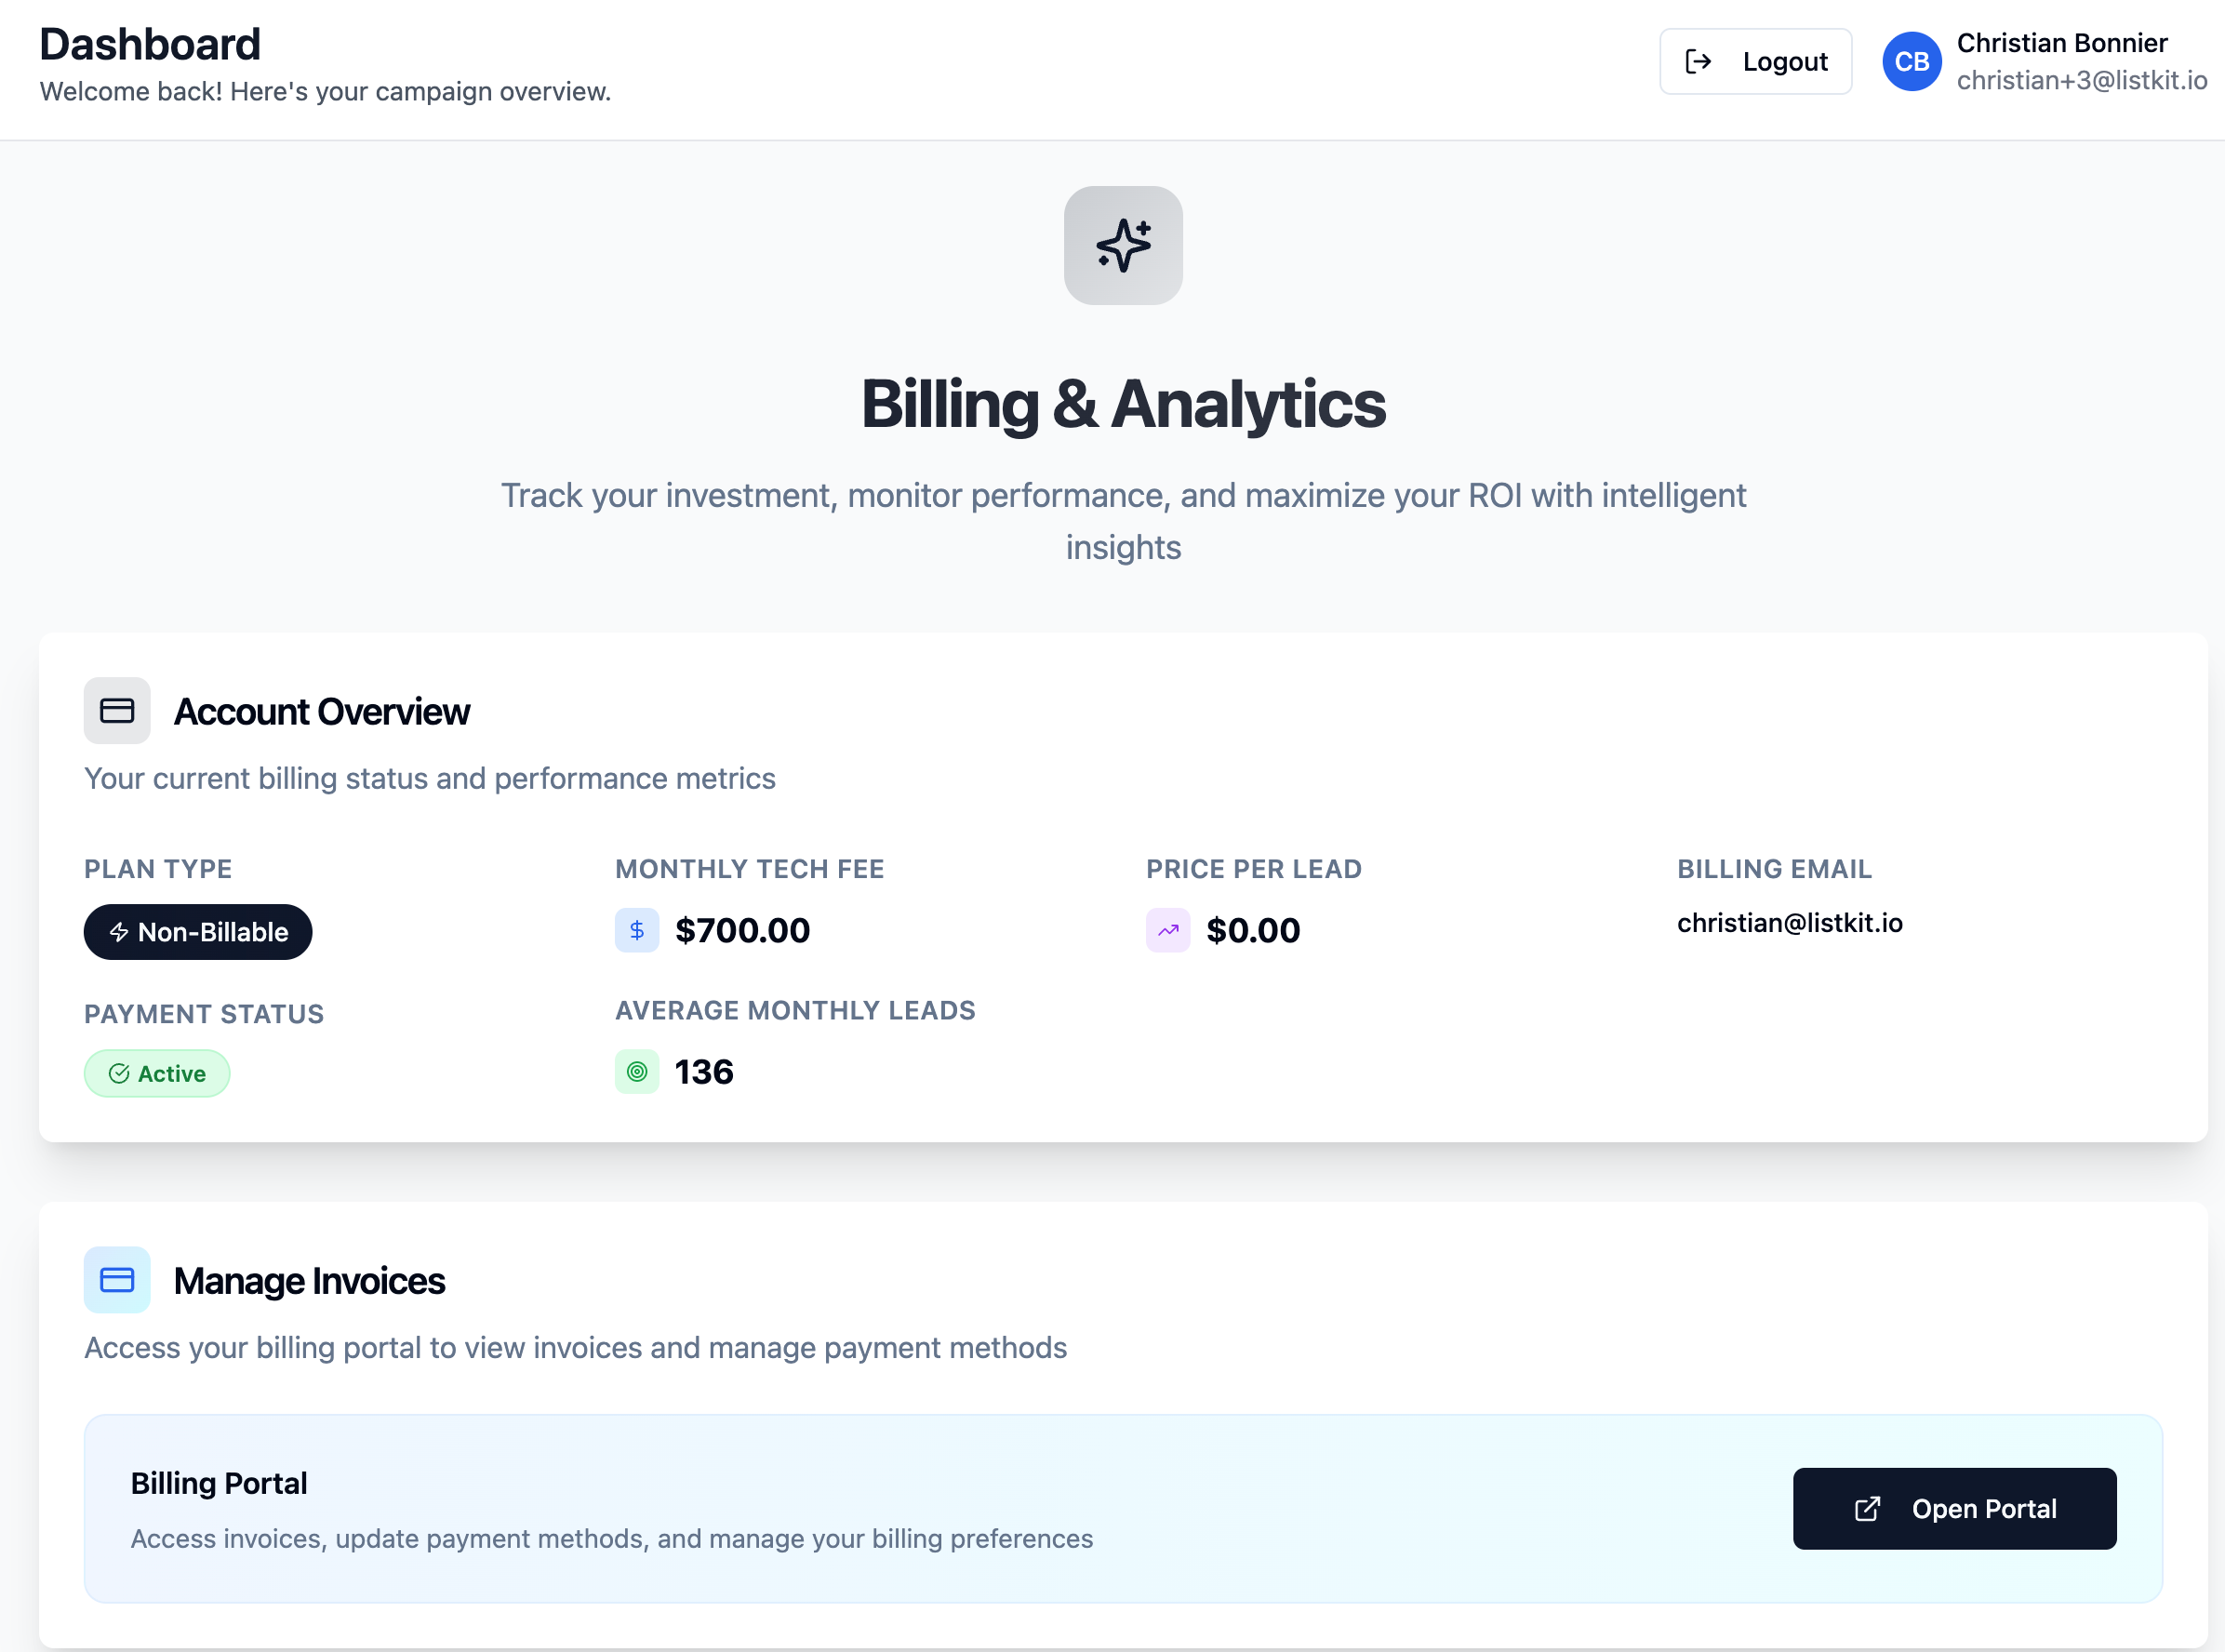
You can:
View Current Plan → See your active subscription (e.g., $500/month with 5,000 lead credits + 10,000 email credits).
Check Renewal Date → Know when your credits reset.
Invoices & Payments → Download invoices, see past transactions, and update card info.
The Smart ROI Analytics → Helps you measure campaign performance, calculate ROI (Return on Investment), and forecast future revenue. By entering your business-specific metrics, you can see how your leads translate into appointments, sales, and long-term revenue.

Important: Your credits reset on your renewal date. For example, if your billing date is the 10th, all lead and email credits reset on the 10th of each month.
Here you can connect your account with your CRM for automatic sync.

Integrate CRMs like HubSpot, Salesforce, Zoho, etc. by yourself (No need to share your zap link to us for CRM integration anymore). Just paste your Zap link and click Send List Lead to map the fields.
Your go-to resource when you’re stuck.
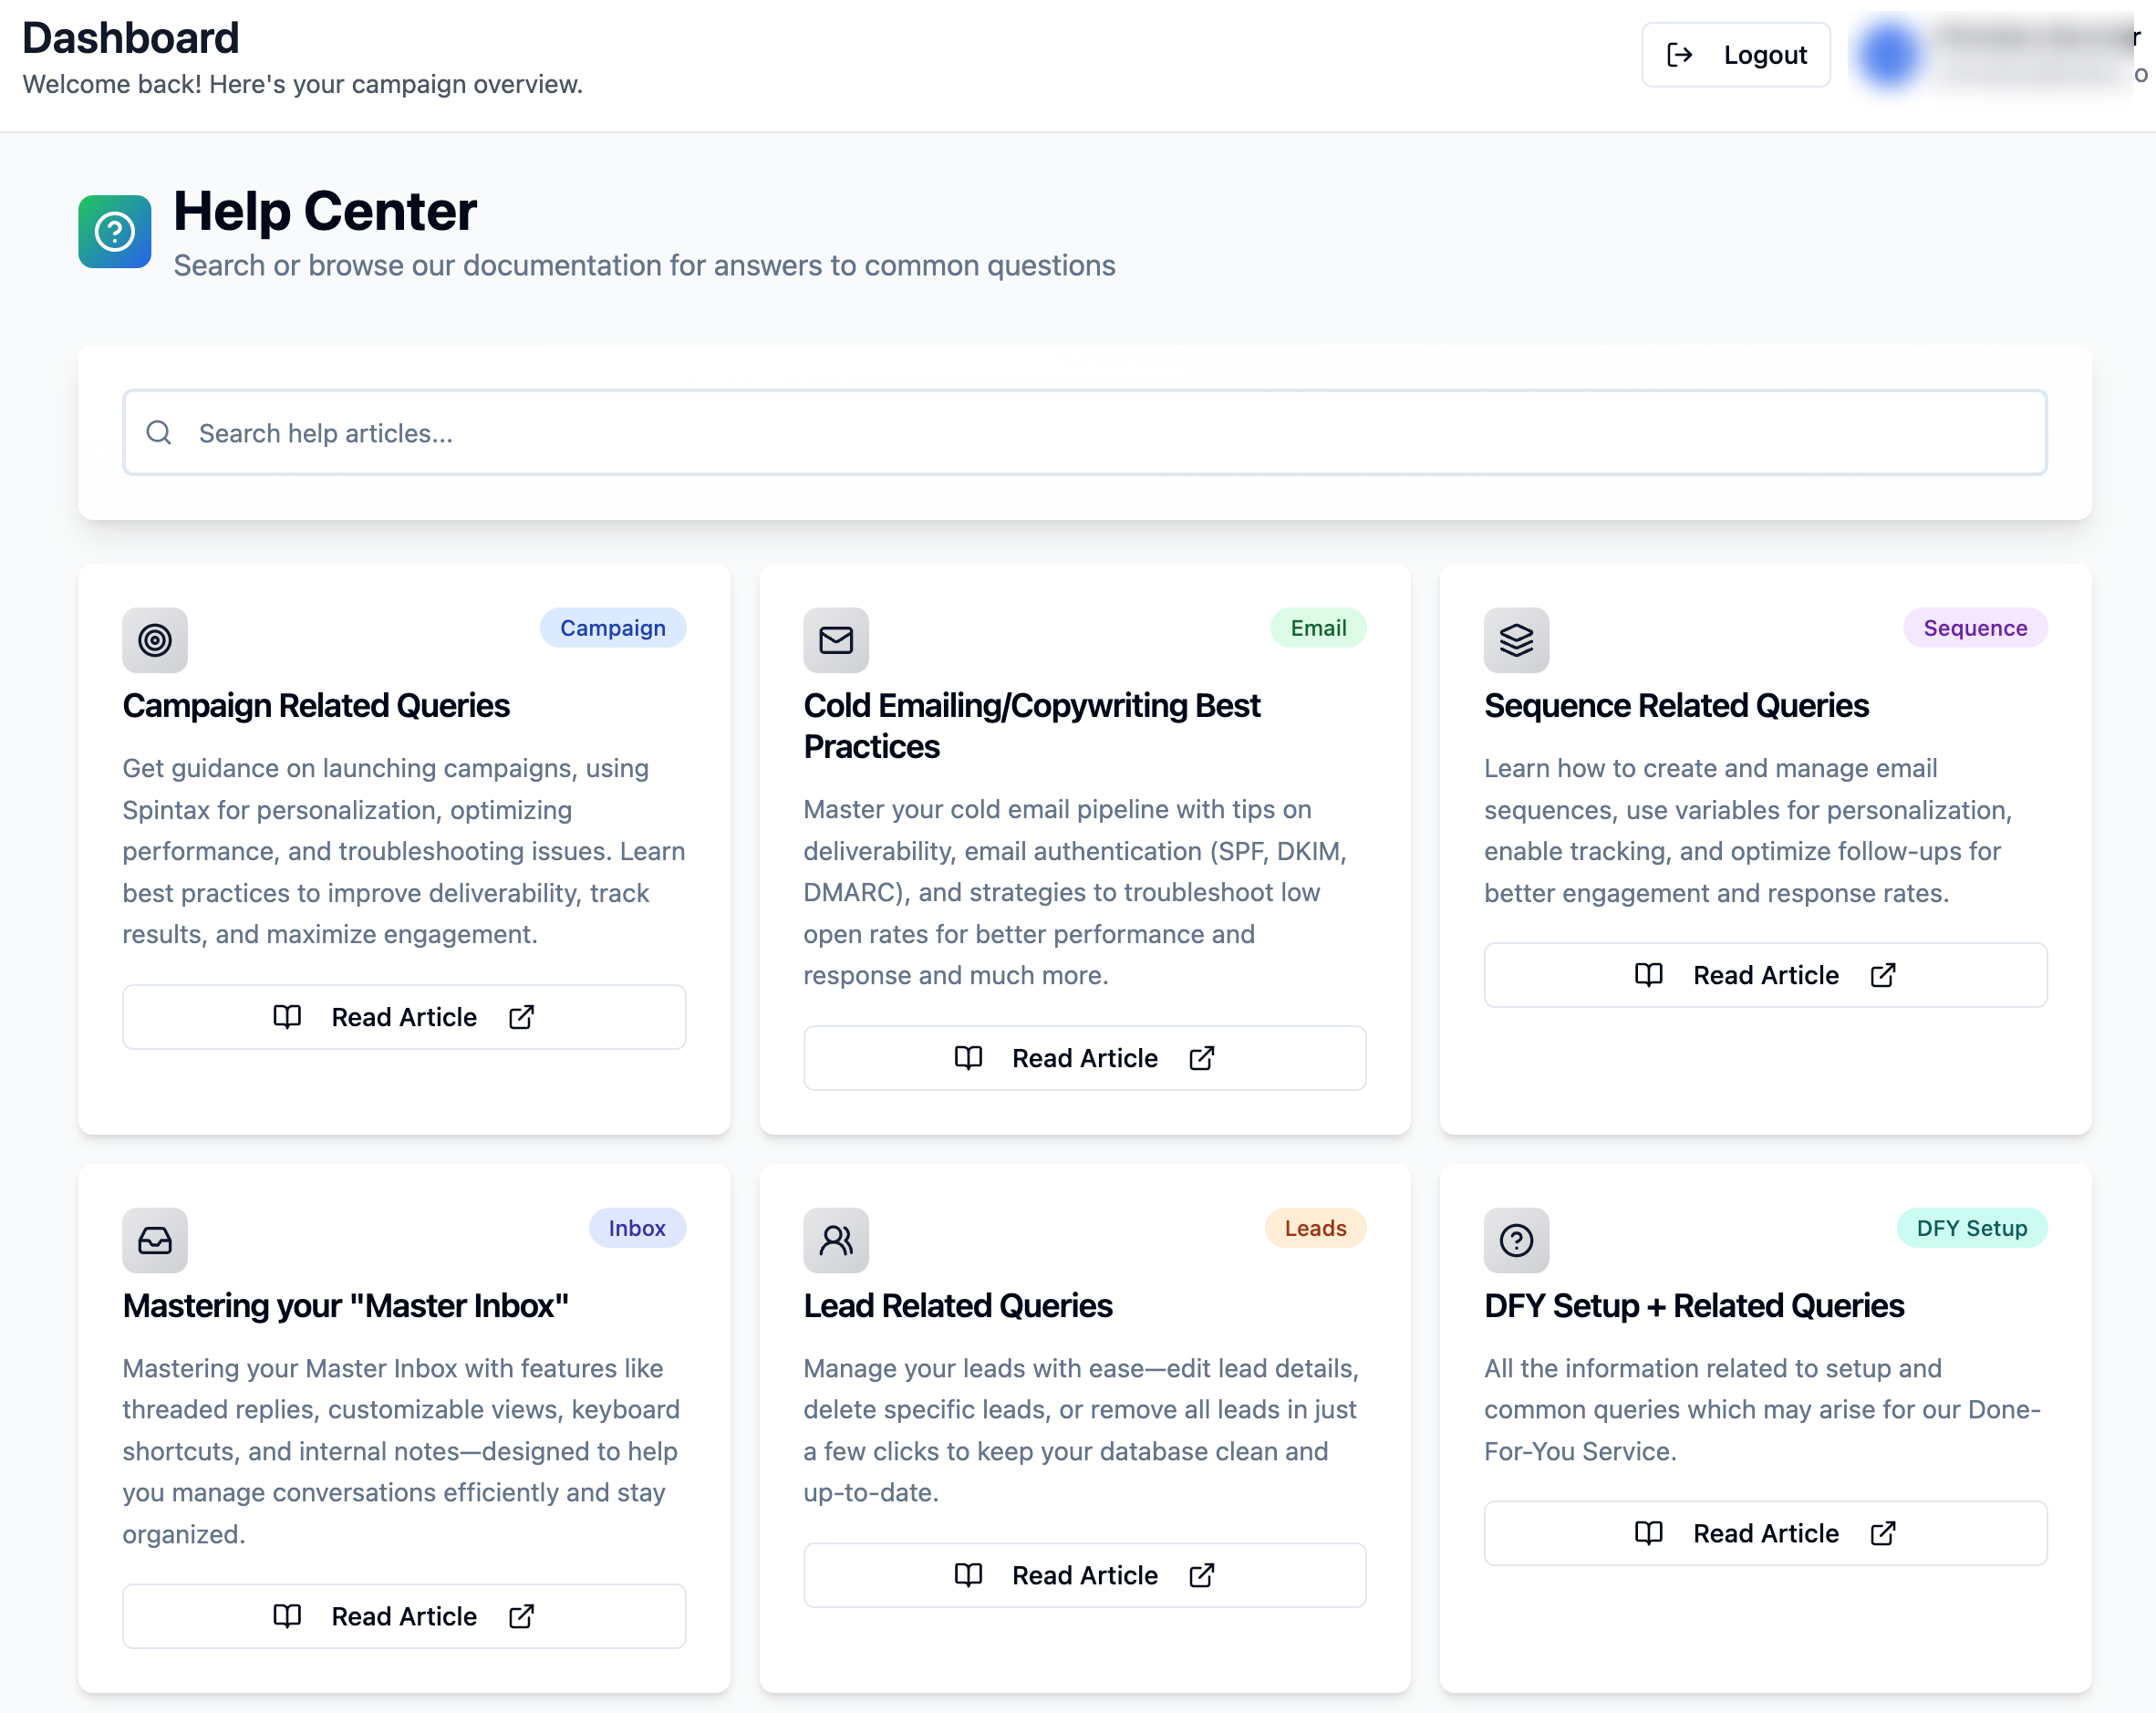
Guides & FAQs → Step-by-step articles like this one.
Video Tutorials → Walkthroughs covering campaign setup, editing, and reporting.
Support Contact → Reach out via email for additional help.
Reminder: Support is limited to email for DFY (Done-For-You) clients, but response time is usually within 24 hours.
